Unlocking the Secrets of Gluten-Free Baking Success
Your comprehensive guide to flavorful, gluten-free creations everyone will love
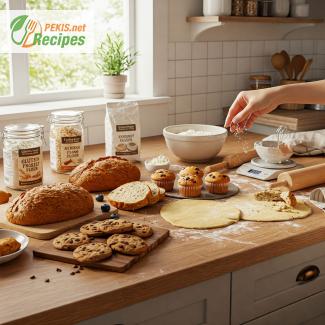
Whether you're navigating a new dietary requirement or embracing a lifestyle change, gluten-free baking can open the door to creative, nourishing, and surprisingly delicious results. This article serves as a detailed roadmap for mastering the art of gluten-free baking, with practical insights, ingredient overviews, and professional guidance to help you create light, fluffy, and flavorful baked goods—without a trace of gluten. From selecting the right flour blends to adjusting moisture content, we’ll walk you through the most effective strategies to achieve consistently excellent results.
Understanding Gluten-Free Flours: Which Ones Are Best for Baking?
Traditional baking relies heavily on wheat flour for structure, elasticity, and texture. Gluten-free baking, however, calls for a more nuanced combination of alternative flours, each offering different characteristics. There’s no single substitute for wheat flour; instead, bakers must blend multiple flours to mimic its properties.
Popular options include:
- Almond flour, rich in protein and fat, ideal for dense cakes and cookies.
- Coconut flour, very absorbent and flavorful, best used in small quantities alongside other flours.
- Sorghum flour, mild and versatile, adds softness to cakes and breads.
- Brown rice flour, great for structure but slightly gritty if not finely milled.
- Tapioca and arrowroot starch, both help create chewiness and stretch.
Pre-made gluten-free all-purpose flour blends often contain a mix of these flours and stabilizers like xanthan gum, making them convenient for beginners. However, experimenting with your own flour combinations can offer more control over taste and texture.
How to Make Gluten-Free Bread Rise Better
One of the most frequent challenges in gluten-free baking is achieving a proper rise and structure in bread. Since gluten provides elasticity and traps air during fermentation, its absence can lead to flat or dense loaves.
To encourage a better rise:
- Use eggs or chia/flax “eggs” for structure and moisture.
- Add xanthan gum or psyllium husk powder to mimic gluten’s elasticity.
- Ensure your dough is slightly wetter than traditional dough; gluten-free batters are usually more like thick cake batter than kneadable dough.
- Let your dough rise in a warm, draft-free area. A proofing drawer or a slightly warmed oven can help.
- Bake in a preheated oven with steam—placing a pan of water on the lower rack can create the right humidity for crust development and lift.
Patience is also crucial. Many gluten-free breads benefit from a longer fermentation (like with sourdough), which develops flavor and helps with digestion.
Tips for Achieving Moist and Fluffy Gluten-Free Cakes
Without gluten to trap moisture, cakes made with gluten-free ingredients often turn out dry or crumbly. But with the right methods, you can create cakes that are tender, moist, and full of flavor.
Key tips include:
- Use yogurt, applesauce, or mashed bananas to retain moisture.
- Avoid overbaking; gluten-free cakes tend to dry out quickly in the oven. Begin testing for doneness 5–10 minutes earlier than a regular recipe.
- Incorporate a combination of starches and proteins, such as almond flour with tapioca starch, for a balanced texture.
- Creaming butter and sugar thoroughly helps to trap air, which promotes lightness in the batter.
Don’t forget to let your cake cool completely before slicing—gluten-free bakes often continue to set as they rest.
Common Mistakes to Avoid in Gluten-Free Baking
Like any culinary discipline, gluten-free baking has its pitfalls. Avoiding common mistakes can save you time, ingredients, and frustration.
Watch out for:
- Using a single flour substitute (e.g., only coconut or rice flour)—this often results in poor texture.
- Skipping binders like xanthan gum, guar gum, or psyllium, which are essential for structure.
- Not weighing ingredients—volume measurements are inconsistent. Always use a kitchen scale for precision.
- Overmixing or undermixing—gluten-free batters can be sensitive. Mix until just combined to prevent gumminess.
Being aware of these traps allows for more consistent success and fewer kitchen disasters.
Can I Substitute Regular Flour with Gluten-Free Flour in Any Recipe?
It’s a common misconception that you can swap wheat flour 1:1 with gluten-free alternatives. In reality, success depends on the recipe and the flour blend being used.
- Cakes, muffins, and cookies are usually more forgiving and can often be made with gluten-free flour blends using a 1:1 ratio, especially when the blend includes xanthan gum.
- Yeast breads and pastries require careful adjustment, as their structure heavily relies on gluten. Here, it’s best to follow tested recipes or experiment gradually.
- Gluten-free flours absorb liquids differently, so you may need to adjust moisture, fat, and baking time.
While experimentation can lead to innovation, following recipes specifically developed for gluten-free ingredients is often the best path for beginners.
The Role of Xanthan Gum and Guar Gum in Gluten-Free Baking
Without gluten, baked goods need a replacement for structure and elasticity. That’s where binding agents like xanthan gum and guar gum come into play.
- Xanthan gum is a microbial polysaccharide that mimics gluten’s stickiness and elasticity. It's widely used in cakes, breads, and cookies.
- Guar gum, derived from guar beans, works similarly but is better suited for cold applications or items with less mixing (like muffins).
- A general rule: Use 1/2 to 1 teaspoon per cup of gluten-free flour in most baked goods.
Some bakers prefer psyllium husk powder for its natural fiber and ability to create flexible dough, especially in bread recipes. Try different binders to see what works best for your creations.
How to Prevent Crumbling in Gluten-Free Baked Goods
Crumbliness is one of the most frustrating results in gluten-free baking, often caused by a lack of moisture, structure, or proper binding.
To reduce crumbling:
- Use moisture-retaining ingredients like eggs, yogurt, or applesauce.
- Add binders such as xanthan gum, psyllium husk, or flaxseed meal.
- Allow your baked goods to rest after baking. Gluten-free items continue to set as they cool, which helps solidify their shape.
- Let cookies and cakes cool in their pans before moving them.
Proper handling, along with the right recipe design, ensures a stable texture without sacrificing taste or structure.
Adjusting Baking Times and Temperatures for Gluten-Free Recipes
Because gluten-free batters behave differently than traditional ones, they may require adjustments in baking time and temperature.
- Start by reducing the baking temperature by about 10–15°C (25°F) to allow for more even cooking without overbrowning.
- Check doneness earlier, especially with cakes and quick breads, as they can dry out quickly.
- Use a toothpick test, but also check for firm edges and bounce-back texture in the center.
Every oven behaves differently, so keep notes on how your specific recipes perform—this will help fine-tune your approach over time.
Delicious Gluten-Free Dessert Ideas for Beginners
Gluten-free desserts can be just as indulgent as their traditional counterparts. If you’re new to gluten-free baking, start with recipes that are naturally gluten-free or forgiving in structure.
Beginner-friendly ideas include:
- Flourless chocolate cake or brownies.
- Coconut macaroons.
- Almond-based biscotti or amaretti.
- No-bake cheesecakes or mousse with gluten-free cookie crusts.
These desserts often require fewer substitutions, letting the quality of the ingredients shine.
How to Convert Your Favorite Recipes to Gluten-Free
Converting your tried-and-true family favorites to gluten-free versions is both rewarding and challenging. Begin with recipes that don’t heavily rely on gluten’s elasticity, such as pancakes, muffins, or dense cakes.
Steps to convert:
- Replace wheat flour with a 1:1 gluten-free flour blend (preferably one with a binder).
- Add extra moisture if needed, such as an additional egg or a tablespoon of milk.
- Let the batter rest for 15–30 minutes before baking to allow flours to hydrate.
- Adjust baking time and monitor closely.
Over time, you’ll develop a sense of how to balance structure and flavor using gluten-free ingredients.
Essential Tools and Equipment for Gluten-Free Baking
Having the right tools makes all the difference in gluten-free baking, where precision and control are key.
Must-have tools include:
- Digital kitchen scale for accurate measurements.
- High-quality mixing bowls and spatulas for thorough blending.
- Stand mixer or hand mixer to aerate batters effectively.
- Sifters or fine-mesh sieves to eliminate clumps in fine flours.
- Silicone baking mats or parchment paper to prevent sticking.
- Bread pans with high sides for better structure support in gluten-free loaves.
Investing in reliable equipment streamlines the process and reduces variability in results.
Are There Gluten-Free Alternatives to Traditional Baking Ingredients?
Beyond flour, gluten-free baking often requires alternatives for other ingredients like breadcrumbs, thickeners, and even sweeteners.
Common swaps:
- Use crushed gluten-free cereal or cornmeal instead of breadcrumbs.
- Substitute arrowroot or cornstarch for flour in sauces or fillings.
- Try honey or maple syrup in place of refined sugar for added flavor and moisture.
Always check labels, as not all products are certified gluten-free even if they seem safe. Being mindful of cross-contamination is essential, especially for those with celiac disease.
How to Store Gluten-Free Baked Goods to Maintain Freshness
Gluten-free baked goods tend to dry out faster than those made with wheat flour, so proper storage is vital.
- Store in airtight containers at room temperature for up to 2–3 days.
- For longer storage, freeze individually wrapped portions and reheat as needed.
- Avoid refrigerating baked goods unless absolutely necessary—it can cause dryness.
- Label and date your baked goods in the freezer for easy access.
Using strategies like vacuum sealing or moisture-preserving containers can further extend freshness and reduce waste.
Troubleshooting Dense or Gritty Gluten-Free Breads
If your gluten-free bread feels like a brick or tastes like sand, don’t worry—it’s fixable. These textures are usually caused by too much starch, poor flour blends, or under-hydration.
To troubleshoot:
- Use finely milled flours to avoid grittiness.
- Ensure your flour blend has enough protein content to support rise and structure.
- Don’t skip hydration steps like resting your batter or fermenting dough.
- Add an acid (like apple cider vinegar or lemon juice) to react with leaveners for better rise.
Continued experimentation with small batch testing will help refine your favorite techniques.
Exploring Nut and Seed Flours in Gluten-Free Baking
Nut and seed flours aren’t just gluten-free—they’re packed with nutrients and flavor. They can add moisture, depth, and complexity to your bakes.
Common examples:
- Hazelnut flour adds richness to cakes and cookies.
- Sunflower seed flour is great for nut-free recipes with a mild taste.
- Pumpkin seed flour offers a green tint and earthy flavor, ideal for hearty breads.
These flours often perform best when blended with starches or lighter flours. Explore them to diversify your textures and elevate your baking results.
With a thoughtful approach and the right ingredients, gluten-free baking becomes more than just a substitute—it becomes an opportunity for creativity, nourishment, and indulgence. Whether you’re preparing breads, cookies, or elegant desserts, these tips will help you bake with confidence and delicious results every time.