Mastering Artisan Texture and Homemade Bread Techniques
Discover how to create soft, flavorful bread with expert-level texture at home
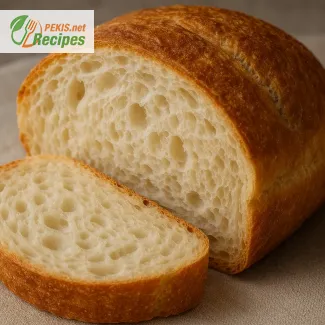
The journey to perfect homemade bread is one of transformation—from flour and water to something deeply satisfying, warm, and nourishing. But beyond that, it’s a way to explore bread texture, ingredients, and the hidden secrets of soft crust and fluffy loaf techniques. Whether you’re making it for a weekly sandwich loaf or an elegant dinner table centerpiece, understanding how ingredients interact, why texture changes, and how to store it properly can completely reshape your baking experience.
What defines soft homemade bread and why is it different from bakery bread?
Soft bread with a fluffy interior stands apart due to how ingredients, handling, and baking environment work together. Most store-bought loaves rely on additives, while homemade versions rely purely on technique and timing.
- Softness comes from how moisture is retained in the crumb. This depends on flour type, fat content, and how dough is mixed.
- Fluffiness results from how well gluten develops and traps air during fermentation.
- A tender crust is achieved by adjusting baking steam, oven temperature, and cooling environment.
What’s magical about soft bread is how simple adjustments—like increasing hydration or incorporating milk fats—can drastically change your final product.
Why does homemade bread become hard, and how can you prevent it?
There’s a common frustration among home bakers: homemade bread turns hard quickly. This has less to do with your baking skills and more with moisture loss and starch retrogradation.
- Bread loses softness when moisture escapes, especially if it’s left uncovered or sliced too soon.
- Starches begin to crystallize during cooling, firming up the crumb and making it seem stale.
To delay this natural process:
- Wrap bread in a breathable cloth right after cooling.
- Avoid refrigerating it—this accelerates staling.
- Store in a cool, dry place and consume within a few days or freeze slices for later.
How to achieve a soft crust instead of a hard artisan-style shell
While crunchy crusts are often desired, many home bakers seek soft bread crust for sandwich-style loaves or dinner rolls. You can influence this outcome at every stage:
- Use dairy or fats in the dough, like butter or milk, to tenderize the crust.
- Brush the crust with butter right after baking while it’s still hot to soften the outer layer.
- Cover freshly baked bread with a clean towel during cooling to trap residual steam and keep the crust pliable.
- Bake at slightly lower temperatures for longer periods if you want to avoid caramelization that leads to a crusty surface.
These methods help create a pillowy crust that’s perfect for kids’ sandwiches, French toast, and breakfast bread.
How can you ensure your bread is fluffy inside every time?
Fluffy bread texture starts with the dough’s structure. Airy bread comes from gas retention during proofing and gentle handling that doesn’t collapse that structure.
- Use high-protein flour to support stronger gluten networks.
- Allow time for fermentation, giving the yeast space to expand and build volume.
- Avoid over-kneading—too much handling tightens gluten and creates a dense loaf.
- Consider folding instead of kneading in wet doughs. It helps align gluten and build structure without breaking bubbles.
- Shape the dough carefully to preserve internal air pockets, and don’t overproof.
When done right, a properly proofed loaf should have a light, spongy crumb and spring back slightly when pressed.
How temperature and humidity affect your loaf
Your kitchen climate matters more than you think. The combination of room temperature, humidity, and dough temperature directly impacts rise and softness.
- In cold environments, fermentation slows dramatically, sometimes leading to under-proofed or dense results.
- Warm but not hot conditions (around 24–28°C) encourage steady yeast activity without overproofing.
- Dough should feel soft, elastic, and slightly tacky—a sign of proper hydration and gluten development.
On hot days, your bread may overproof quickly. Reduce yeast slightly or shorten the proofing time. On cooler days, extend rise times or place dough in a slightly warmed oven (turned off) to regulate fermentation.
What ingredients help keep bread moist and fresh longer?
Beyond the usual flour, water, salt, and yeast, some ingredients have a direct role in improving softness and shelf life:
- Milk: Adds fat and sugar, softening the crumb and crust.
- Honey or sugar: Retain moisture and slow staling.
- Butter or oil: Create a tender mouthfeel and keep bread pliable.
- Eggs: Improve texture and contribute to a richer, more delicate crumb.
- Potatoes or yogurt: Introduce moisture-holding starches that add softness and stretch freshness.
These additions are often used in enriched bread styles, like sandwich bread, brioche, or milk rolls.
What role does steam play in baking and crust development?
Steam in the first minutes of baking affects how the crust forms. In a moist environment, the surface of the dough stays soft longer, allowing it to expand fully and develop a thin, delicate crust.
If you’re aiming for a crispy artisan-style crust, steam is crucial. But for soft crusts:
- Bake in a covered pan (like a Dutch oven) but remove the lid halfway through if you want a semi-crusty finish.
- Alternatively, avoid steam altogether and lower oven temperature slightly for a tender, more elastic crust.
Every oven reacts differently, so observing how your bread responds will help fine-tune your results.
How to slice and store bread to maintain softness
Even if you’ve baked the perfect loaf, it can dry out quickly with improper handling.
- Let bread cool fully before slicing. Cutting warm bread releases steam, making the inside gummy and shortening shelf life.
- Use a serrated bread knife and slice only what you need. Whole loaves retain moisture longer.
- Store in a linen bread bag or wrap loosely in foil—this prevents excessive drying while avoiding condensation.
- For long-term storage, freeze sliced bread and toast it as needed.
Practical uses for soft homemade bread in everyday cooking
Homemade bread isn't just for sandwiches—it’s a culinary building block. Once mastered, you can explore numerous creative applications:
- Tear-apart rolls for buffets and family dinners
- Garlic toast or cheese melts with grated toppings
- Stuffed French toast or breakfast casseroles
- Savory bread puddings with herbs and cheese
- Mini sliders or burger buns using enriched dough
- Cinnamon swirl bread made from the same base
These applications allow you to turn one basic dough into multiple dishes, enhancing both your cooking routine and your appreciation for homemade bread.
How different flour types change softness and flavor
The choice of flour impacts everything from chewiness to hydration capacity:
- All-purpose flour offers balanced softness and ease of use.
- Bread flour gives a chewier, higher-rise loaf thanks to its higher protein content.
- Whole wheat flour brings nuttiness and fiber but often requires a mix with white flour for softness.
- Spelt or rye adds character and depth—great for rustic loaves or dense sandwich slices.
Understanding how flour behaves with water and yeast helps you adjust your methods for consistent softness and volume.
Can soft homemade bread be made gluten-free?
While gluten contributes significantly to stretch and softness, gluten-free bread can still achieve a tender crumb with the right approach:
- Combine high-starch flours like rice, potato, or tapioca with binders such as xanthan gum or psyllium husk.
- Use more hydration and longer mixing times to simulate gluten development.
- Bake in smaller pans to support structure and prevent collapse.
The key is to build structure with alternatives, ensuring that your gluten-free loaves don’t crumble or harden quickly.
Are there health benefits to baking your own bread?
Yes—homemade bread offers significant advantages beyond flavor:
- No preservatives or emulsifiers.
- Lower sodium and sugar content, adjustable to your needs.
- Ability to use organic flours, seeds, or sprouted grains.
- More digestible crust and crumb due to long fermentation.
- Boosted nutritional value by using add-ins like oats, bran, flax, or sunflower seeds.
These benefits make homemade bread not just a culinary choice, but a lifestyle enhancement for families, individuals with food sensitivities, or anyone focused on wellness.
Advanced techniques to push your bread-baking further
Once you've mastered the basics of softness and fluffiness, elevate your skills with:
- Pre-ferments like poolish or biga for better taste and longevity
- Autolyse method to strengthen dough without kneading
- Scoring patterns to control oven spring and add artistry
- Double fermentation for complex sourdough-style loaves
- Chilling proofed dough overnight for better control and oven timing
With each method, your hands and senses become more attuned to dough behavior, unlocking a world of creativity in breadmaking.
This deep dive into softness, crust management, ingredient science, and daily uses ensures that your homemade bread is more than just a recipe—it becomes a personalized experience in craft, flavor, and health.