The tradition of decorating eggshells during Easter is a cherished ritual that blends creativity, family bonding, and the joy of spring celebrations. One of the most effective ways to elevate your Easter decorations is by starting with white eggshells. A pristine, neutral surface allows for vibrant colors, intricate designs, and a polished look. The process of whitening eggshells is simple, safe, and relies on everyday household items, making it accessible for anyone wanting to create beautiful Easter displays.
Why Whiten Eggshells?
The decision to whiten eggshells is more than just an aesthetic choice; it's a practical step that enhances the overall quality of your decorations. Natural brown or speckled eggshells can dilute or distort the colors applied during decoration. By whitening the shell, you achieve a clean canvas, which ensures brighter and more vivid designs. Moreover, whitened eggs have a modern and elegant appearance, perfectly suited for minimalist or classic decor themes.
This process is particularly useful if you're looking to incorporate natural dyes or paint intricate patterns. A lighter base ensures every detail stands out, giving your eggs a professional finish. Whether you're crafting Easter table centerpieces, creating holiday gifts, or indulging in family activities, whitening eggshells adds a touch of sophistication to your designs.
The Natural Approach to Eggshell Whitening
Using natural ingredients like white vinegar and baking soda, the whitening process is gentle on the environment and avoids the need for harsh chemicals. This makes it an excellent choice for families with children or anyone looking to maintain an eco-friendly lifestyle.
Vinegar works by breaking down the natural pigments in the shell, while baking soda assists in removing surface impurities, leaving the eggshell smooth, bright, and clean. This combination ensures not only a whiter appearance but also a polished texture that's ready for decoration.
The process is straightforward and requires minimal effort. Within 20–30 minutes, you can transform ordinary eggs into an exquisite blank canvas, ready for your creativity to shine.
A Step Toward Sustainability
Choosing to whiten and decorate eggs instead of using plastic or artificial decorations is a nod to sustainability. Not only does it reduce waste, but it also encourages the use of natural materials that are biodegradable. Hollowing out the eggs before whitening allows them to be preserved for years, creating timeless keepsakes and reducing the need for single-use decorations.
A Tradition Rooted in Symbolism
Eggs have long been a symbol of new life, hope, and renewal, making them the perfect emblem for Easter celebrations. By taking the time to whiten and decorate eggshells, you’re not only engaging in a creative activity but also honoring a tradition steeped in cultural and historical significance.
Creative Possibilities After Whitening
Once your eggshells are whitened, the possibilities for decoration are endless. You can use:
- Natural dyes: Ingredients like beet juice, turmeric, or spinach create stunning, earthy tones.
- Paints and markers: Add intricate patterns or whimsical designs for a modern touch.
- Wax resist techniques: Apply wax before dying to achieve beautiful, detailed patterns.
- Adornments: Attach dried flowers, ribbons, or lace for an elegant finish.
The whitened shells also make excellent bases for creating Easter ornaments. String a ribbon through a hollowed egg and hang it from a branch or wreath for a charming seasonal display.
Tips for Success
- Always use fresh eggs with smooth shells to avoid cracks during the whitening process.
- Ensure the shells are completely dry before decorating to prevent smudges.
- If you’re using hollowed eggs, handle them gently to avoid breaking the fragile shells.
Inspiring a New Easter Tradition
The act of whitening eggshells can be more than just preparation for decoration—it can become a cherished family tradition. Gathering around the kitchen table to prepare and decorate eggs brings people together, fostering creativity, laughter, and connection.
By integrating this simple yet transformative process into your Easter preparations, you’re adding a layer of elegance and meaning to your celebrations. Whitened eggshells not only elevate your decorations but also create lasting memories and keepsakes.
This year, let your Easter be adorned with the beauty of pure, white eggshells, a timeless canvas for your artistic expressions and a tribute to the enduring symbolism of renewal and new beginnings.
- Prepare the eggs:
Wash the eggs thoroughly under warm water to remove any dirt. If you wish to create hollow shells for lasting decorations, pierce small holes at the top and bottom of each egg and gently blow out the contents. - Boil the eggs (optional):
If you're not hollowing out the eggs, boil them in water for 10 minutes to harden the contents and avoid spoilage. - Prepare the whitening solution:
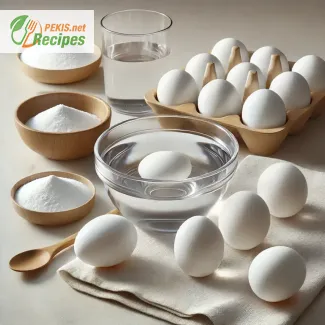
In a large bowl, mix 500 ml of white vinegar with 1 liter of warm water. Add 10 g of baking soda carefully, as the mixture will fizz slightly. Stir gently to combine. - Soak the eggs:
Submerge the eggs or hollow shells in the solution, ensuring they are fully covered. Allow them to soak for approximately 20 minutes, turning them occasionally for even whitening. - Rinse and dry:
Once the shells are sufficiently whitened, rinse them under warm water to remove any residue. Place them on a clean towel and let them air dry completely. - Optional decoration:
Once dry, the eggshells are ready for painting, dyeing, or embellishment as desired.
Tips and Adjustments for Enhancing the Eggshell Whitening Process
The process of whitening eggshells is straightforward and effective, but with a few thoughtful adjustments, you can optimize the results to suit your needs. Whether you're aiming for a brighter finish, a unique decorative effect, or a more eco-friendly approach, there are several ways to tweak the recipe and process for whitening eggshells. Below is a detailed guide to help you explore alternatives and understand how these changes can impact the final outcome.
Why Adjust the Ingredients or Technique?
While the standard recipe with vinegar and baking soda works perfectly, experimenting with different methods can:
- Alter the appearance of the eggshells.
- Enhance the efficiency of the whitening process.
- Make the process more eco-friendly or suited to available resources.
- Create unique textures and effects for decorative purposes.
Using Alternative Acids for Whitening
White vinegar is the most common choice for whitening eggshells due to its high acidity and accessibility. However, other acids can also work effectively, each with unique characteristics:
- Lemon or lime juice: A natural alternative that produces a similar whitening effect. The citrus aroma is a pleasant bonus, especially if children are involved. However, the process may take slightly longer compared to vinegar.
- Apple cider vinegar: Slightly less acidic than white vinegar, apple cider vinegar will whiten the shells but may leave a faint yellowish tint. This could work well if you’re aiming for a rustic or natural look.
- Citric acid: Available in powdered form, citric acid can be mixed with warm water to create a strong whitening solution. This is particularly effective for eggshells with tough pigmentation.
Adjusting the Baking Soda Quantity
Baking soda acts as a mild abrasive, aiding the removal of surface impurities. By altering its quantity, you can impact the whitening process:
- Increasing the amount of baking soda (up to 20 g per liter) will speed up the whitening but may cause the eggshells to become slightly more fragile.
- Reducing the baking soda creates a gentler process, which is better for hollowed eggshells that need to maintain their structural integrity.
Replacing Water with Alternative Liquids
The liquid base in the recipe primarily helps dilute the acid and immerse the eggs. Substituting water with other liquids can introduce subtle differences:
- Sparkling water or club soda: The carbonation helps create more bubbles during the reaction, which can enhance the removal of surface stains.
- Weak tea (unsweetened): While not common, soaking eggs in diluted tea creates a slight tint or texture that could work well for unique, natural-themed decorations.
- Chamomile infusion: Adds a mild scent and is particularly appealing when working in a family setting or for eco-conscious users.
Choosing the Type of Eggs
The type of eggs you select significantly affects the outcome of the whitening process:
- White eggs: These are the easiest to whiten and require minimal soaking time. The result is a crisp, bright surface, ideal for vibrant decorations.
- Brown eggs: Though they take longer to whiten, brown eggs often retain a faint ivory or cream tint even after soaking. This can be a desired effect for a vintage or neutral aesthetic.
- Quail eggs: Their speckled shells create naturally intricate patterns even after whitening, making them a popular choice for unique displays.
Enhancing the Longevity of Hollowed Shells
Hollowing out eggs is ideal for decorations you want to keep for a long time. To strengthen the shells and make them less prone to cracking:
- Add a teaspoon of salt to the soaking solution. This helps harden the shell slightly during the whitening process.
- After drying, apply a thin layer of clear varnish or natural beeswax to the shell's surface. This not only adds a shine but also protects the shell from damage over time.
Natural and Eco-Friendly Whitening Alternatives
If you prefer a more sustainable approach, you can replace traditional ingredients with eco-friendly options:
- Wood ash and water: Create an alkaline solution by soaking wood ash in hot water. This traditional method can gently whiten eggs without chemicals.
- Baking soda and hot water: While slower than vinegar-based methods, this is a completely natural alternative that still achieves a moderate level of whitening.
Creative Adjustments for Decorative Effects
Whitening is often the first step in a creative journey. By making small adjustments during this process, you can add decorative touches right from the start:
- Resist techniques: Before whitening, apply wax or oil to specific areas of the shell to create patterns that remain darker or untouched.
- Tinted whitening: Add a few drops of natural dye (e.g., turmeric or beet juice) to the whitening solution for a slight color tint.
Considerations for Taste (If Eggs Are Cooked)
If you're whitening whole eggs and not just hollow shells, remember that the soaking solution may subtly impact the taste:
- Vinegar can leave a faint tangy flavor. Rinse the eggs thoroughly under warm water to minimize this effect.
- Lemon juice produces a milder flavor and may even complement certain savory dishes if the eggs are consumed post-decoration.
- Adding aromatic herbs like rosemary or thyme to the soaking water can impart a gentle herbal note to boiled eggs.
Tips for Success
- Always handle eggshells gently during and after the whitening process, especially if hollowed, as they can become more delicate.
- Ensure that the shells are completely dry before decorating to avoid smudging paints or dyes.
- Store the shells in a cool, dry place if not used immediately, to prevent warping or cracking.
Customizing the process of whitening eggshells offers endless possibilities for achieving the perfect base for your Easter decorations. Whether you’re experimenting with different ingredients, aiming for eco-friendliness, or enhancing durability, these adjustments provide a foundation for creativity. By exploring these tips, you can make the experience even more enjoyable and meaningful while crafting personalized decorations that stand out.
- Allergens: Eggs (major allergen).
- Gluten: This recipe is naturally gluten-free.
Substitution for allergens:
If allergic to eggs, substitute with ceramic, wooden, or plastic egg replicas for decoration.
- Vitamin A: 270 IU – supports vision health.
- Vitamin D: 41 IU – essential for bone health.
- Vitamin B12: 0.6 mcg – promotes nerve function.
- Selenium: 15.4 mcg – acts as a powerful antioxidant.
- Phosphorus: 99 mg – strengthens bones and teeth.
- Lutein and Zeaxanthin: 252 mcg – protect the retina from damage.
- Selenium: 15.4 mcg – reduces oxidative stress and boosts immunity.
This recipe for whitening eggshells provides a natural, eco-friendly way to create stunning Easter decorations while preserving tradition and creativity!
