The secret to a perfect shiny glaze for modern cakes
Mastering mirror glaze with precision and ease
Creating a mirror glaze cake that genuinely delivers on both looks and flavor is a pursuit that challenges even seasoned pastry chefs. But with the right ingredients, temperature control, and technique, achieving that flawless, glass-like finish is not just possible—it's repeatable. This recipe doesn’t rely on complicated tricks or obscure stabilizers. It focuses on the fundamental pastry principles that produce reliable, stunning results.
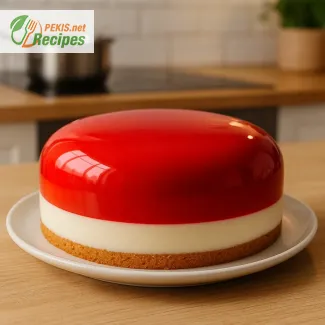
The fascination with mirror glaze cakes continues to grow, thanks to their captivating appearance and impressive finish that reflects like polished glass. Whether you're planning a centerpiece for a celebration or simply want to elevate your baking skills, this guide is built to help you understand what makes a mirror glaze work—and why it sometimes doesn’t.
Unlike buttercream or fondant, a well-made mirror glaze provides a modern, fluid finish that clings to the curves of a mousse cake or a ganache-covered sponge. It is glossy, dramatic, and entirely edible, making it a favorite for elegant patisserie-style desserts. Yet, despite its visual impact, the ingredients are surprisingly simple: gelatin, sugar, glucose or corn syrup, condensed milk, white chocolate, and food coloring. The real magic lies in the method—how you heat, blend, cool, and pour.
What makes mirror glaze unique
Mirror glaze, or glaçage miroir, isn’t just about shine. It’s about achieving perfect consistency, reflective surface tension, and an ultra-smooth application that doesn’t run or bubble. The reason mirror glaze works is due to the interplay of gelatin and sugar, creating a stable matrix that sets with a perfectly smooth finish. When applied at the correct temperature—ideally between 30°C and 35°C (86°F to 95°F)—the glaze spreads evenly and sets upon contact with the cold cake.
This recipe balances sweetness with texture, preventing the glaze from becoming too rubbery or too thin. While many recipes focus purely on visual appeal, a glaze that also tastes good ensures that the final product isn’t just beautiful but also enjoyable to eat.
Why temperature control is everything
The number one mistake in mirror glaze preparation is incorrect temperature. If it’s too hot, the glaze melts the cake surface or runs off too quickly. Too cold, and it won’t pour smoothly. Precision is key, and a reliable kitchen thermometer is your best tool. Another essential factor is cake temperature: it must be frozen solid before glazing to allow for immediate setting and high reflectivity.
Time and temperature are closely tied to success. After preparation, the glaze should rest to release air bubbles, ideally through gentle stirring or sieving. Many home bakers overlook this step, resulting in a bumpy or uneven glaze. A proper rest period of 10–15 minutes before pouring allows the ingredients to stabilize.
Tools and preparation essentials
To make a mirror glaze that delivers a flawless finish, you don’t need fancy equipment—but you do need precision and cleanliness. A hand blender (immersion blender) is ideal for blending the glaze without introducing air. A fine mesh sieve removes any unmelted chocolate or gelatin clumps. And finally, a cooling rack over a sheet pan helps catch excess glaze and allows for easy cleanup.
Color is also a key factor. Gel-based food coloring is preferred over water-based dyes, as it blends more evenly and maintains vibrancy without thinning the mixture. This technique supports bold monochrome designs as well as galaxy, marble, or ombré effects, which are popular among contemporary cake artists.
Ideal cakes for glazing
Not all cakes are suited for mirror glaze. To get the best result, your base cake should have a smooth surface, ideally finished with mousse or a frozen ganache coating. Classic sponge cakes with textured finishes won't create the same effect. Most professionals prefer entremets or mousse cakes as the canvas for mirror glaze, due to their clean lines and compatibility with freezing.
Another key factor is shape. Domes, cylinders, and symmetrical round cakes work best, as they promote even glaze distribution and minimize pooling. Cakes with sharp angles or textured sides can disrupt the flow, leading to streaking or break lines in the glaze.
Color, shine, and artistic expression
Mirror glaze is an ideal medium for edible art. You can mix multiple colors, layer metallic powders, or even apply stencils and patterns to create mesmerizing visuals. However, the underlying science always remains the same: a smooth, chilled surface, a fluid glaze at the right temperature, and a clean pour.
Whether you aim for minimalist elegance or vibrant color explosions, the principles remain constant. Some bakers add titanium dioxide for a more opaque effect or layer multiple pours for a dramatic finish. The beauty of mirror glaze is that it allows creativity to shine—literally.
This technique brings together modern pastry science, artistic vision, and precise execution. And once you've mastered it, you'll have a show-stopping finish that elevates any cake into a bakery-level creation.
1. Bloom the gelatin
In a small bowl, combine gelatin powder with cold water and let it sit for 5–10 minutes to bloom fully.
2. Prepare the glaze syrup
In a medium saucepan, combine sugar, glucose syrup, and water. Bring to a gentle boil over medium heat until the sugar is completely dissolved.
3. Add condensed milk
Remove the syrup from the heat and stir in the sweetened condensed milk.
4. Combine with gelatin
Add the bloomed gelatin to the warm mixture and stir until fully dissolved.
5. Melt chocolate and blend
Place white chocolate into a tall container. Pour the warm mixture over it and let it sit for 1–2 minutes to soften the chocolate. Use an immersion blender to blend until smooth and glossy, being careful to avoid air bubbles.
6. Color the glaze
Add desired food coloring and optional titanium dioxide for extra opacity. Mix gently until evenly distributed.
7. Strain and rest
Pass the glaze through a fine sieve into a clean bowl. Let it rest at room temperature until it cools to 32–35°C (89.6–95°F), the optimal pouring temperature.
Assembling the mousse cake
1. Prepare the mousse
Whip the cold heavy cream until soft peaks form. In a separate bowl, beat the cream cheese with powdered sugar and vanilla extract until smooth. Bloom the gelatin as described above, melt it gently, and fold it into the cream cheese mixture. Gently fold in the whipped cream to create a light mousse.
2. Assemble in a mold
Line a 20 cm (8 inch) silicone mold with cling film or acetate. Pour in half the mousse, insert the sponge cake base, cover with the remaining mousse, and smooth the surface.
3. Freeze the cake
Place the mold in the freezer for at least 6 hours, preferably overnight, until completely solid.
4. Glaze the cake
Unmold the frozen cake onto a wire rack set over a tray. Pour the cooled mirror glaze evenly over the cake in one smooth motion. Allow excess glaze to drip off. Let the cake set in the fridge for 1 hour before serving.
Enhancing your mirror glaze cake with expert tweaks
From classic technique to culinary mastery
The art of crafting a mirror glaze cake is already a visually stunning and impressive achievement, but there is always room to elevate its flavor, texture, and presentation. By carefully adjusting key elements of the recipe or introducing advanced methods, you can transform the standard approach into a refined dessert worthy of a patisserie. Whether you're aiming for more vibrant colors, improved flavor depth, or dietary modifications, even the smallest changes can make a significant difference.
Adding flavor without compromising the shine
While traditional mirror glaze focuses heavily on aesthetics, it's possible to infuse it with subtle flavors without sacrificing the glossy finish. One of the simplest and most effective ways is to incorporate natural flavor extracts or fruit purées into the glaze. For example:
- Adding raspberry purée (strained and reduced) lends a subtle tartness and a natural red hue.
- A touch of orange or lemon zest enhances freshness, especially in white chocolate-based glazes.
- For a more decadent twist, a few drops of coffee extract can add sophistication to dark-colored glazes.
However, it’s important to maintain the right glaze consistency, especially when using fruit purées. Overly watery ingredients can break the emulsion and dull the shine, so always reduce and strain purées before mixing.
Health-conscious swaps and alternatives
For a lighter and slightly healthier version of the cake, consider the following adjustments:
- Reduced-sugar white chocolate or sugar-free condensed milk can help lower overall sugar content, especially useful for diabetic-friendly versions.
- Replace cream cheese in the mousse with Greek yogurt to reduce fat while maintaining creaminess.
- Use plant-based cream and chocolate to create a completely dairy-free version of the cake. Coconut-based ingredients also work well and pair beautifully with tropical flavors like passionfruit or mango.
- Substitute gelatin with agar-agar for a vegetarian alternative, bearing in mind that agar sets firmer and faster, requiring careful temperature control.
These adaptations not only allow you to cater to different dietary needs but also encourage creative combinations and unique flavor profiles.
Avoiding common mirror glaze mistakes
Many bakers encounter similar problems when attempting their first mirror glaze, often resulting in disappointing textures or uneven finishes. To ensure success, avoid these frequent pitfalls:
- Pouring the glaze too hot will melt the outer layer of your mousse and destroy the smooth surface.
- Pouring it too cold results in a lumpy glaze that sets before it spreads evenly.
- Not straining the glaze after blending allows chocolate chunks or gelatin bits to disrupt the glossy finish.
- Skipping the rest period before pouring can trap air bubbles, which will appear as dents or holes on the cake surface.
- Not freezing the cake solid before glazing leads to poor adhesion and dull spots.
Precision with temperature and timing is essential, especially when dealing with multi-layered entremets or cakes that contain fillings and textures.
Boosting texture and balance
One way to elevate a mirror glaze cake is to add texture contrast to the soft mousse and smooth glaze. Introducing a crunchy layer beneath the sponge—such as a feuilletine base or a nutty praline crunch—adds a delightful surprise. This contrast not only enhances the eating experience but also provides a more complex mouthfeel.
Additionally, consider reducing the sweetness of the mousse if your glaze and base are already rich. A touch of sea salt, a bitter chocolate layer, or tangy fruit like passionfruit can provide a welcome balance.
Elevating the visual artistry
Mirror glaze opens the door to expressive creativity, especially when working with colors and design. To take your finish to the next level:
- Use metallic powders or edible gold leaf for a luxurious effect.
- Try multiple pour techniques, combining colors to create marble, galaxy, or watercolor finishes.
- Apply silicone stencils before glazing to reveal patterns once the stencil is removed.
- Use a spray of edible glitter or velvet spray after glazing for extra dimension.
However, less is often more. A clean, monochrome mirror glaze in bold color with subtle decorations often has more visual impact than overly complex finishes.
Why homemade mirror glaze always wins
Preparing mirror glaze at home gives you full control over ingredients, sweetness level, and texture. Unlike commercial glazes that may contain stabilizers, preservatives, or artificial thickeners, a homemade glaze allows you to create a product that's both clean and customizable. You also have the ability to tailor it to the needs of your guests—whether that’s avoiding allergens, reducing sugar, or showcasing seasonal flavors.
Moreover, the satisfaction of seeing your cake gleam under the light, knowing it was entirely made by hand, adds a personal touch that no store-bought dessert can replicate.
Adapting to seasonal inspirations
To keep your mirror glaze cakes exciting throughout the year, try incorporating seasonal flavors and themes:
- Spring: Floral notes like lavender or elderflower in the mousse, pastel color glazes.
- Summer: Berry purées, citrus zest, and tropical fillings with bright color finishes.
- Autumn: Use spiced chocolate mousse, caramel glaze, or pumpkin notes with burnt orange hues.
- Winter: Rich hazelnut praline, peppermint accents, or mulled wine spices in red or silver glaze designs.
Each adaptation provides an opportunity to experiment while honoring the classic technique.
By understanding the chemistry and aesthetics behind mirror glaze, you’re not just following a recipe—you’re mastering a technique that bridges tradition and modern dessert design.
Allergens present in the recipe
- Milk (cream, condensed milk, white chocolate, cream cheese)
- Gelatin (animal origin)
- Egg (if sponge cake includes egg)
- Gluten (from sponge cake unless using gluten-free base)
Substitution tips for allergens and gluten
- Gluten-free sponge: Use certified gluten-free flour mix or almond flour base.
- Dairy-free: Substitute with plant-based cream, vegan condensed milk, dairy-free cream cheese, and vegan white chocolate.
- Gelatin-free (vegetarian): Use agar-agar in adjusted quantities and procedures (gelatin and agar set differently).
Vitamins and minerals per serving (approximate)
- Calcium: 85 mg – Supports bone health
- Vitamin A: 480 IU – Important for skin and vision
- Vitamin D: 1.2 µg – Aids in calcium absorption
- Magnesium: 18 mg – Supports nerve and muscle function
- Phosphorus: 95 mg – Helps in energy production
- Potassium: 150 mg – Regulates fluid balance
- Vitamin B2 (Riboflavin): 0.22 mg – Converts food into energy
- Vitamin B12: 0.8 µg – Supports red blood cell formation
Antioxidants per serving (approximate)
- Vitamin E: 1.5 mg – Protects cells from oxidative stress
- Beta-carotene (from food coloring): 350 µg – Boosts immune function
- Phenolic compounds (white chocolate): Trace – May reduce inflammation
- Lutein (optional if used in colorants): 200 µg – Supports eye health
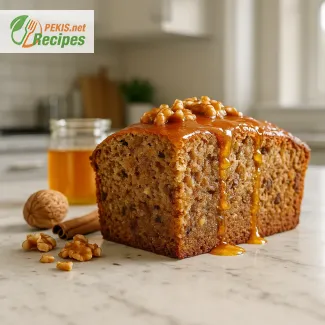
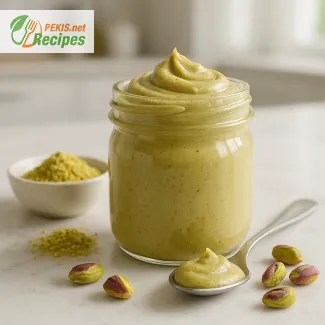
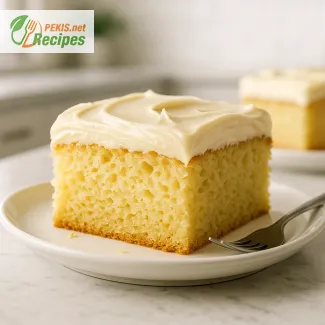
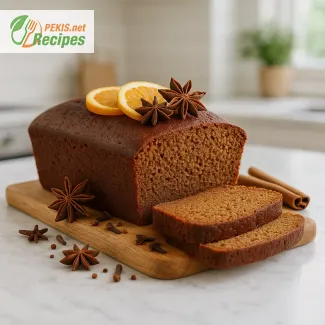
Recipes worth trying