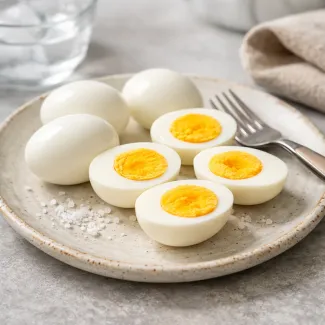
Color settles into the shell, then a gentle polish reveals a quiet shine that feels precise rather than artificial. In Deep-Colored Easter Eggs with Glossy Shell for a Clean Festive Table, the surface stays smooth, the tone even, and the finish clean—an effect that holds best at the moment of serving, where light, texture and restraint define the visual impact.
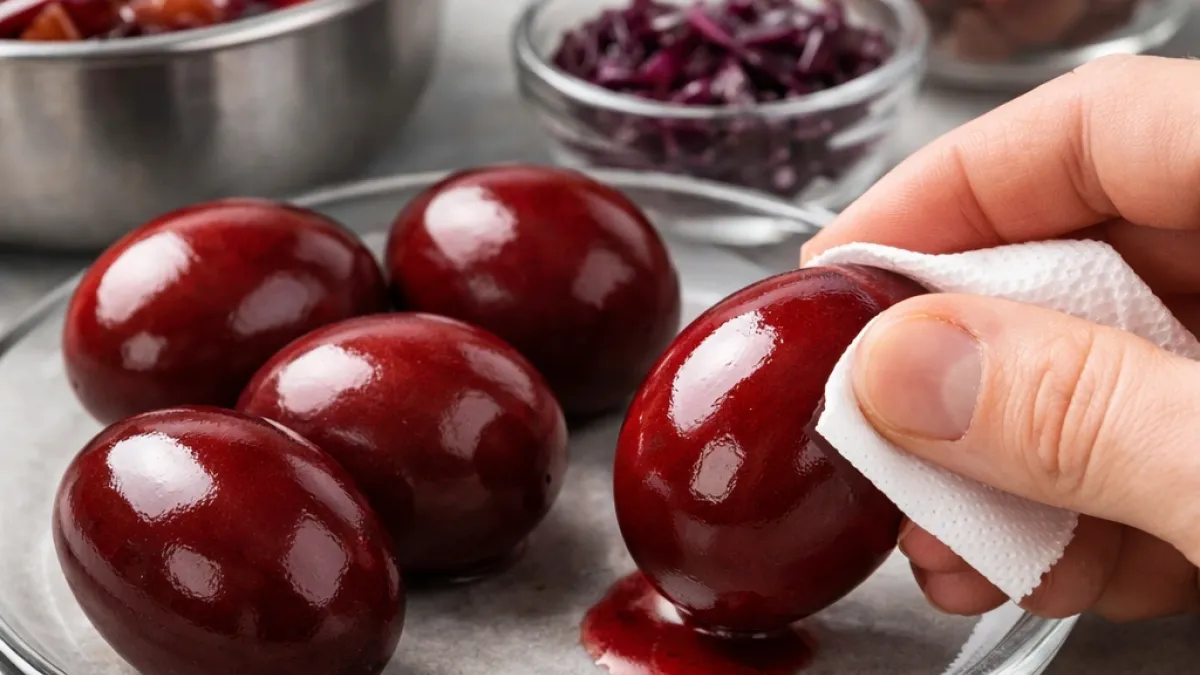
Even Color Depth and Glossy Finish on Easter Eggs Without Surface Damage
Why some eggs turn dull or patchy while others stay smooth and reflective
An egg is lifted from the dye, still warm, and placed onto a clean surface; as a cloth touches the shell, the matte layer shifts into a controlled gloss, revealing a uniform, deep tone without marks. This contrast—between dull, uneven results and a clean, reflective finish—defines the difference between casual coloring and a stable, table-ready outcome. Within the process of natural Easter egg dyeing, this final phase determines whether the shell holds color evenly or breaks into patches.
Flavor and texture profile
Even in a visually driven preparation, the internal structure remains part of the experience.
- Flavor: neutral, clean egg base without interference
- Aroma: light vegetal trace from natural dye sources
- Mouthfeel: firm white, stable yolk, no moisture on the surface
- Surface texture: dry, sealed, with a soft reflective finish
The key contrast lies between internal firmness and an externally smooth, controlled surface.
Technical logic of the result
The final appearance is the result of aligned physical and chemical processes:
- Protein coagulation: stable internal structure formed under controlled heat
- Pigment absorption: natural dyes penetrate the porous shell evenly
- Acid fixation: vinegar binds pigment to the shell, preventing uneven fading
- Surface drying: gradual evaporation stabilizes the outer layer before polishing
If any step is inconsistent, the shell becomes patchy rather than uniform.
Difference from similar approaches
Not all decorative methods aim for uniformity:
- Artificial dyes often create intense but flat coloration without depth
- Metallic finishes, such as golden Easter eggs, emphasize surface reflection rather than absorption
- Structured techniques like marbled eggs intentionally introduce variation and texture
This method focuses on consistency, depth, and clarity, avoiding visual fragmentation.
Practical quality signals
A correct result is easy to identify when key signals align:
- Color depth: even saturation across the entire shell
- Surface integrity: no cracks, no discoloration zones
- Absence of streaks: no visible transitions or marks
- Controlled gloss: soft reflection, not oily or artificial
- Clean handling: no fingerprints or residue
These indicators confirm proper bonding between pigment and shell.
Limitations of use
The result is stable but not universally durable:
- High humidity can soften the finish and reduce gloss
- Repeated handling introduces surface marks and dulling
- Tight packing during transport leads to abrasion
- Extended storage gradually reduces visual intensity
The method prioritizes appearance at the moment of serving.
Storage and stability
After preparation, the structure evolves:
- Store in a dry, ventilated environment to preserve surface clarity
- Avoid moisture accumulation, which disrupts the finish
- Over time, gloss naturally transitions into a more matte surface
- Refrigeration maintains structure but can mute visual depth
The shell remains intact, but visual precision decreases first.
Professional culinary insight
The decisive factor is not the dye, but surface control before and after coloring. A properly cleaned shell allows even pigment attachment, while controlled drying defines whether the finish remains smooth or becomes irregular. Heat, acidity, and time support the process, but the final quality depends on how consistently the surface moves from wet to stable.
- Clean eggs thoroughly and degrease shells under warm water; dry completely
- Place onion skins and chopped red cabbage into a pot; add water
- Bring to a boil, then simmer 15 minutes to extract color
- Strain liquid into a clean pot; discard solids
- Add vinegar to the warm dye bath and mix
- Gently place eggs into the liquid using a spoon
- Simmer at 95°C (203°F) for 10 minutes without boiling
- Turn off heat and leave eggs submerged for 50–60 minutes
- Remove eggs carefully and place on a dry cloth
- Let eggs air dry completely without wiping
- Lightly polish dry shells with a clean cloth to achieve gloss
If the shell feels chalky after dyeing, the issue is incomplete surface drying—wait until the outer layer stabilizes before polishing to lock color stability and prevent streaking. This is where even pigment bonding becomes visible under light. That quiet control defines the result—this is how works Chef PEKIS, refining surface behavior into consistent outcomes.
FAQ questionWhy do some eggs turn patchy instead of evenly colored?
Uneven color usually means the shell surface was not properly cleaned or the dye did not bond evenly. Any residual grease or moisture blocks pigment absorption, creating pale spots. The shell must be fully degreased and handled dry before immersion to ensure uniform color depth.
Chef’s tip: In practice, patchiness often appears where the egg was touched most just before dyeing.
FAQ questionHow can I control the intensity of color without overcooking the egg?
Color intensity depends more on time in dye than on boiling duration. Keep the cooking phase stable and extend the resting phase in the dye bath instead. This allows pigment to penetrate without affecting the internal structure.
Chef’s tip: From experience, deeper tones come from patience after heat, not from longer boiling.
FAQ questionWhat if the eggs lose their shine after drying?
A dull surface usually indicates incomplete drying or excess moisture left on the shell. The gloss appears only after the surface stabilizes and is lightly polished. Avoid wiping too early, as this disrupts the forming layer.
Chef’s tip: It’s common to see dullness when eggs are moved before they are fully dry, even if the color looks correct.
FAQ questionWhy do eggs crack during dyeing even if I handle them gently?
Cracking is often caused by rapid temperature changes or aggressive boiling. A controlled simmer keeps the internal pressure stable, preserving shell integrity. Sudden heat expansion weakens the shell structure.
Chef’s tip: In many kitchens, cracks appear not from handling, but from water that was just slightly too hot.
FAQ questionCan I achieve the same smooth result with supermarket eggs?
Yes, but shell quality varies. Eggs with thinner or more porous shells absorb dye differently and may show slight variation in tone. Consistency comes from controlling the process rather than relying on the source.
Chef’s tip: It’s often noticeable that eggs from the same batch behave more uniformly than mixed sources.
FAQ questionHow do I keep eggs clean and glossy on a festive table for longer?
Limit direct handling and keep them in a dry environment. Oils from fingers quickly reduce surface clarity, and humidity softens the finish. Arrange them with space to avoid contact marks.
Chef’s tip: From a service perspective, the first visual degradation usually comes from touch, not from time.
The light softens as the eggs settle into place, their surfaces catching just enough reflection to hold the eye without asking for it. The table feels quieter now, as if everything has already found its position.
There is a kind of stillness in that moment—when nothing needs adjusting, when the color holds steady and the surface no longer shifts. Even the smallest movement seems unnecessary.
Outside, the air carries a trace of early spring, faint and clean. It lingers near the open window, mixing with the subtle scent of warm shells and cooled water.
What remains is not the process, but the pause—the gentle sense that something simple has reached its balance.
- Eggs – main allergen; replace with plant-based decorative eggs for non-edible use
- Gluten – not present; naturally gluten-free
- Vitamin A (µg): 80 – supports vision and immune function
- Vitamin D (µg): 1 – contributes to bone health and calcium absorption
- Vitamin B12 (µg): 1 – essential for nervous system and red blood cells
- Iron (mg): 1 – supports oxygen transport in blood
- Phosphorus (mg): 95 – important for bones and energy metabolism
- Selenium (µg): 15 – antioxidant protection and thyroid support
- Anthocyanins (mg): 25 – protect cells and support cardiovascular health
- Flavonoids (mg): 18 – reduce oxidative stress and inflammation
- Polyphenols (mg): 30 – support cellular protection and longevity
Calculators



Recipes worth trying