A charming twist on a classic: delightful cookies shaped like buttons
Whimsical design meets irresistible taste in these bite-sized treats
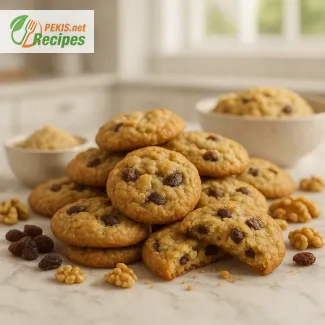
There's something undeniably nostalgic about a perfectly baked cookie—especially when it’s crafted not just for flavor, but also for fun. Hit the Button cookies, known for their signature shape mimicking old-fashioned buttons, bring a playful charm to the world of baking. These button-shaped cookies are not only eye-catching on any dessert table but also melt-in-your-mouth delicious, making them a favorite for all ages. Their dainty size, buttery texture, and endless decorating options have made them a go-to treat for birthdays, holidays, baby showers, tea parties, and cozy weekends at home.
The allure of Hit the Button cookies lies in their delicate balance between taste and presentation. The base dough is rich, smooth, and pliable—ideal for shaping, pressing, and punching out those classic buttonholes that give each cookie its unique identity. Whether you opt for vanilla, almond, citrus zest, or a hint of spice, these cookies are a blank canvas for creativity. Decorated with colorful sugars, dipped in chocolate, or left beautifully plain, their appearance is just as delightful as their flavor.
For parents and kids alike, baking button cookies is more than just a recipe—it’s a bonding activity. Children love pressing the shapes, choosing colors, and watching them transform in the oven into adorable, edible buttons. These cookies become conversation starters at events, often admired for their whimsical shape and craftsmanship, yet devoured within minutes for their buttery crispness and comforting sweetness. Their consistent popularity on social platforms and baking blogs showcases their wide appeal and versatility.
One of the reasons button cookies stand out is their versatile dough. With minimal ingredients, it’s simple enough for novice bakers yet adaptable for those who wish to experiment. Add a teaspoon of matcha for a green tint, cocoa for richness, or swap in gluten-free flour for dietary preferences—the dough responds well to modifications while retaining its core structure. When baked to perfection, they hold their shape without spreading too much, preserving the classic button silhouette.
Presentation plays a big role in the popularity of these cookies. Displayed in rustic jars, tied into cellophane bags as gifts, or arranged on ornate platters, Hit the Button cookies are visually stunning. Their playful appearance makes them ideal for themed events—imagine pastel-hued buttons for a baby shower or red and green versions for a holiday spread. Even in minimalist designs, their neat form and gentle shine make them hard to resist.
Taste-wise, the combination of melt-in-the-mouth texture and subtle sweetness hits all the right notes. Each bite begins with a gentle crunch, followed by a soft, buttery center that speaks to the quality of ingredients used. A light dusting of sugar or drizzle of icing can elevate the flavor, but these cookies shine even in their simplest form. They're not overly sweet, which makes them ideal for pairing with tea, coffee, or hot chocolate—enhancing their appeal as an everyday indulgence or a sophisticated treat.
In recent years, cookie cutters shaped like buttons have become a trending baking accessory, fueling the rise in popularity of these dainty desserts. With more bakers embracing the art of edible design, Hit the Button cookies have found a lasting place in the world of decorative baking. They're an invitation to slow down, get creative, and indulge in a treat that looks as lovely as it tastes.
Whether you’re planning a festive occasion or simply want to surprise loved ones with something unique, button cookies offer the perfect blend of charm, nostalgia, and flavor. Their versatility, ease of preparation, and visual appeal make them a staple for both amateur and seasoned bakers. Their delicate design captures the imagination, while their taste ensures they’ll disappear quickly from any plate.
Step 1: Preheat your oven to 170°C (340°F). Line a baking sheet with parchment paper.
Step 2: In a large mixing bowl, cream together the unsalted butter (120 g / ½ cup) and powdered sugar (60 g / ½ cup) until smooth and fluffy.
Step 3: Add the vanilla extract (5 ml / 1 tsp) and continue mixing.
Step 4: Sift in the all-purpose flour (180 g / 1 ½ cups), cornstarch (40 g / ⅓ cup), and salt (1 g / ¼ tsp). Mix until a soft dough forms.
Step 5: Divide the dough if using multiple food colorings and tint as desired. Mix gently until color is evenly distributed.
Step 6: Roll the dough into small balls (about 2.5 cm / 1 inch in diameter) and place them on the baking sheet. Slightly flatten each ball with the back of a spoon.
Step 7: Use a round piping tip or the end of a wooden spoon to create the classic “button” indentations: one larger circle in the middle and four small holes to mimic sewing holes.
Step 8: Bake for 12 minutes, or until the edges are just starting to turn golden.
Step 9: Allow the cookies to cool on the tray for 5 minutes, then transfer to a wire rack to cool completely.
Step 10: Serve as-is or decorate with colored icing or edible paint for extra charm.
Elevating the art of baking: creative ways to refine button cookies
From simple to sensational—expert tips to transform a classic cookie recipe
Perfecting a classic recipe is both a science and an art. While Hit the Button cookies are beloved for their charming shape and buttery texture, there’s always room for innovation. By making thoughtful adjustments, you can enhance flavor, texture, and even nutritional value without losing the nostalgic appeal of these delicate treats. Whether you’re an experienced baker or a weekend hobbyist, understanding how each ingredient functions and how small changes affect the outcome is the key to consistently delicious results.
Ingredient swaps that change the flavor profile
Altering a traditional recipe begins with examining the building blocks—butter, flour, sugar, and flavorings. Each element in button cookies can be adjusted to influence not only taste but also texture and aroma.
For instance, swapping unsalted butter with brown butter introduces a deeper, nutty richness that adds a gourmet twist. Brown butter enhances the overall aroma and lends the cookies a warm caramel note, perfect for autumn or holiday baking.
If you prefer a more tender crumb, try replacing a portion of the all-purpose flour with almond flour. This not only creates a softer texture but adds a subtle nuttiness and moistness, making each bite more luxurious. Almond flour also increases the protein content slightly, which can improve satiety.
Flavor enhancements can come from adding lemon zest, orange blossom water, or a drop of almond extract to the dough. These subtle additions offer a burst of freshness or complexity without overpowering the original vanilla base.
Natural color alternatives for visual appeal
While food coloring creates vibrant cookies, many bakers prefer natural alternatives for coloring dough. Using matcha powder adds a green hue and an earthy flavor, while beetroot powder delivers a pinkish-red tone with subtle sweetness. Turmeric gives a golden yellow without significantly altering the taste when used sparingly. These ingredients not only enhance color but contribute antioxidants and phytonutrients to the recipe.
Why homemade cookies always win
Store-bought cookies often contain preservatives, artificial flavors, and hydrogenated oils, which can compromise both flavor and health benefits. Homemade button cookies are fresher, customizable, and made with recognizable ingredients. When prepared at home, you can control sugar levels, flour quality, and fat content, tailoring the final result to suit your dietary needs or flavor preferences.
Moreover, baking at home adds emotional value. The act of preparing and decorating each button cookie becomes a shared experience, especially when done with children or friends. The aroma of cookies baking in the oven and the satisfaction of pulling out a tray of perfectly shaped treats can’t be replicated by any store-bought version.
Avoiding common baking mistakes
Several issues can arise when baking Hit the Button cookies, and knowing how to prevent them makes all the difference. One of the most frequent problems is overworking the dough, which results in dense or tough cookies. Mixing should stop once the dough just comes together.
Another misstep is baking at too high a temperature, causing the cookies to brown too quickly and lose their soft texture. Always use an oven thermometer to ensure the correct internal temperature, especially since many ovens vary by several degrees from their display.
Imprecise measurements are also common culprits of baking failure. Use a digital scale for accuracy, particularly for flour and sugar, which can drastically affect the dough’s consistency.
Finally, many overlook the importance of cooling the dough before shaping. Chilled dough is easier to mold and helps the cookies hold their shape during baking, preserving that distinctive button design.
Health-conscious adjustments that still taste amazing
If you’re looking to make button cookies a bit more nutritious without compromising flavor, try substituting part of the powdered sugar with coconut sugar. While it may slightly darken the dough, it adds a mild caramel note and has a lower glycemic index.
Replacing some or all of the butter with cold-pressed coconut oil introduces healthy fats while keeping the cookies tender. For a vegan version, use plant-based margarine and ensure your sugar is free from animal-derived additives.
Whole grain flours, such as spelt or whole wheat pastry flour, can also be used for a heartier version. Start with a 50/50 blend with all-purpose flour to maintain a soft texture while adding more fiber and nutrients.
Texture and structure tips for professional results
For perfectly crisp yet tender cookies, consider sifting the flour and cornstarch together before adding them to the butter mixture. This not only ensures even distribution but also creates a finer crumb structure.
Letting the dough rest in the fridge for 30 minutes enhances both flavor development and workability. The chilled dough is less sticky and easier to roll and shape precisely, which is crucial for the visual appeal of button cookies.
To avoid over-baking, remove the cookies from the oven as soon as the edges begin to turn golden. They will continue to firm up as they cool on the baking tray, ensuring a melt-in-the-mouth interior with a lightly crisp exterior.
Presentation ideas that add flair
Once baked and cooled, these cookies can be enhanced further with a light sugar glaze, a dusting of edible shimmer powder, or even a tiny ribbon threaded through the buttonholes if used for decoration rather than consumption. They make excellent edible gifts and can be color-coordinated for different events such as baby showers, birthday parties, or seasonal holidays.
Adding a small amount of edible gold leaf or painting with natural food dyes can elevate the visual experience and make your homemade cookies feel truly artisanal.
Perfecting Hit the Button cookies is about more than just following a recipe—it's about understanding how each ingredient plays its part and embracing creativity without losing the essence of the original. By using high-quality components, avoiding common pitfalls, and exploring personalized touches, you can transform this charming cookie into a signature treat that delights the eyes and satisfies the palate.
Allergens present in the recipe:
- Wheat (gluten)
- Butter (milk/dairy)
Suggestions for replacing allergens and gluten:
- Replace all-purpose flour with gluten-free flour blend (same quantity).
- Replace butter with plant-based margarine to make it dairy-free.
- Ensure powdered sugar is certified gluten-free if cross-contamination is a concern.
- Vitamin A: 355 IU – supports vision and immune system
- Calcium: 12 mg – essential for bone health
- Iron: 0.8 mg – aids in red blood cell formation
- Magnesium: 9 mg – supports nerve and muscle function
- Potassium: 55 mg – helps maintain fluid balance and muscle function
- Vitamin E: 0.4 mg – acts as an antioxidant protecting cells
- Beta-carotene: 18 µg – converted into Vitamin A, supports immune health
- Vitamin E: 0.4 mg – helps protect cells from oxidative stress
- Phenolic compounds: minimal (trace amounts in flour and vanilla) – general cell protection benefits
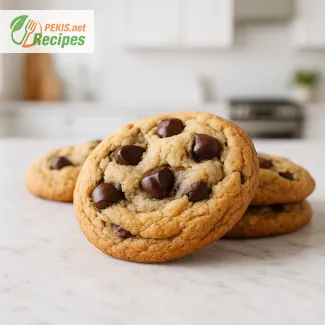
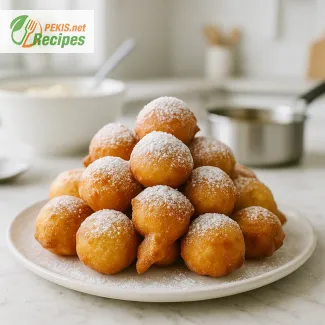
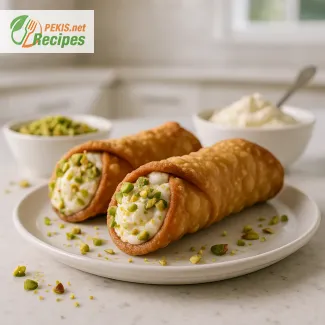
Recipes worth trying