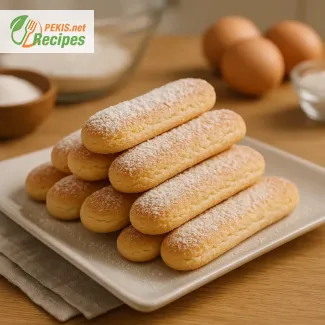
The Timeless Charm of Homemade Ladyfingers
Light and Crisp Sponge Biscuits That Elevate Every Dessert
Often referred to as sponge fingers or by their Italian name savoiardi, ladyfingers are one of the most essential components in classic European pastry making. These delicate, elongated biscuits are characterized by their light, airy interior and slightly crisp exterior, making them perfect for absorbing coffee, liqueur, or syrup in desserts like tiramisu, charlotte cake, and trifles.
What makes ladyfingers stand out is their simplicity. Made from just a handful of pantry staples—eggs, sugar, flour, and a touch of vanilla—they’re the epitome of a well-balanced baked good. Their structure comes from expertly beaten egg whites folded into a rich yolk mixture, producing a batter that puffs up in the oven into perfectly shaped, sponge-like cookies.
Why Homemade Ladyfingers Are Worth the Effort
While store-bought ladyfingers are convenient, homemade ladyfingers have a distinctly superior texture and taste. When baked fresh, they offer a subtle sweetness and a gentle crispness on the outside that gives way to a melt-in-the-mouth center. This balance is critical when layering into desserts, especially for recipes like tiramisu, where the biscuits must soak up coffee without falling apart.
Crafting them at home allows you to control the sweetness and firmness, depending on the intended dessert. Whether you prefer a softer ladyfinger for creamy parfaits or a firmer one to hold shape in layered cakes, adjusting the baking time and technique can make a noticeable difference.
Savoiardi in Global Desserts
Though they originated in the 15th century at the court of the Duchy of Savoy in Italy, ladyfingers have been embraced globally. In France, they appear in charlotte russe. In Spain, they’re known as melindros and served with hot chocolate. In Germany, they’re used in kalter hund (cold dog cake). Across cultures, the function remains the same: a neutral, sponge-like base to complement rich, creamy fillings.
The global recognition of savoiardi has even led to the name being adopted internationally. Many baking enthusiasts refer to “savoiardi” as the go-to term for the biscuit, especially in the context of Italian desserts. The keyword itself is now as much a part of modern culinary vocabulary as the treat it represents.
The Texture That Defines a Classic
The secret to the perfect ladyfinger texture lies in precision. The batter must be airy yet stable enough to hold its shape when piped. The exterior should have a dry, crisp feel with a golden hue, while the interior remains soft and sponge-like. A dusting of powdered sugar before baking not only enhances the appearance but also creates a thin, glossy crust—ideal for absorbing moisture without becoming soggy.
Once cooled, these sponge fingers can be used immediately or stored in an airtight container. In many cases, recipes call for slightly stale ladyfingers, as they hold their shape better when soaked, making them even more versatile in layered desserts.
Ladyfingers as a Canvas for Creativity
Ladyfingers are not just a structural element in desserts—they're also a canvas for flavor experimentation. Though traditionally plain, they can be infused with lemon zest, almond extract, or espresso powder for a customized twist. Some variations dip one end in melted chocolate, turning the humble biscuit into an elegant treat for tea parties or festive platters.
Because they are naturally low in fat and don’t require butter or oil, they also lend themselves well to light desserts and dietary adaptations, such as gluten-free or refined sugar-free versions. Their versatility makes them an ideal addition to both traditional and modern dessert repertoires.
Essential for Tiramisu and More
No dessert showcases the power of ladyfingers more than classic Italian tiramisu. The biscuit acts as the foundation, absorbing rich espresso and balancing the velvety mascarpone cream. The contrast of textures and flavors makes each bite harmonious and indulgent. But their utility doesn’t stop there—ladyfingers can also be layered with mousse, puddings, or fruit compotes for effortless no-bake desserts that impress with minimal effort.
Whether you’re building a multi-layered charlotte or crafting an elegant plated dessert, the quality of the ladyfingers can elevate the final result. That’s why mastering your own batch at home is an investment in flavor and presentation.
Choosing the Right Ingredients for Best Results
The simplicity of ladyfingers means that each ingredient plays a critical role. Fresh eggs provide lift and richness. Finely sifted all-purpose flour ensures a light crumb, and granulated sugar stabilizes the meringue while adding just enough sweetness. A pinch of salt heightens the flavor, and real vanilla extract adds depth.
For best results, room-temperature eggs and careful folding are key. Overmixing can deflate the batter, while undermixing leads to uneven texture. Precision in piping—ideally using a piping bag with a round tip—ensures consistent shape and even baking.
These small techniques result in beautifully shaped ladyfingers that bake evenly, with the signature soft interior and golden shell. Once you’ve mastered the method, you’ll find endless ways to incorporate them into your baking adventures.
1. Prepare the equipment:
Preheat your oven to 180 °C (350 °F). Line two baking trays with parchment paper. Fit a piping bag with a 1.5 cm (½ inch) round tip.
2. Beat egg yolks:
In a large bowl, whisk the egg yolks with half of the sugar (50 g / ¼ cup) until pale, thick, and creamy. Add vanilla extract and mix gently.
3. Whip egg whites:
In a clean bowl, beat the egg whites with a pinch of salt. Once soft peaks form, gradually add the remaining sugar (50 g / ¼ cup), beating until stiff peaks form.
4. Fold the mixtures:
Gently fold the yolk mixture into the egg whites using a spatula. Be careful not to deflate the volume. Sift together the flour and cornstarch, then fold them into the batter in batches until fully incorporated.
5. Pipe the ladyfingers:
Transfer the batter to the prepared piping bag. Pipe 10 cm (4 inch) long strips onto the baking paper, spaced about 2.5 cm (1 inch) apart. Lightly dust with powdered sugar.
6. Bake:
Bake in the preheated oven for 10–12 minutes or until lightly golden and firm to the touch. They should be crisp on the outside and soft inside.
7. Cool and store:
Remove from the oven and allow to cool completely. Use immediately in desserts like tiramisu or store in an airtight container for up to 1 week.
Elevating Homemade Savoiardi for Flavor and Texture Perfection
Practical ways to enhance your ladyfinger biscuits at home
Mastering the art of ladyfinger biscuits (savoiardi) opens the door to a range of elegant desserts, but improving upon the classic recipe can make them truly exceptional. With a few thoughtful adjustments in technique or ingredients, it’s possible to bring out more flavor, achieve a better texture, or even make them healthier without compromising authenticity.
How small ingredient changes can transform the result
One of the simplest ways to improve traditional ladyfingers is by enriching the batter with natural flavor infusions. While the classic recipe calls for vanilla extract, replacing or complementing it with almond extract, orange blossom water, or lemon zest can add aromatic complexity. These additions subtly shift the flavor profile and are especially welcome in desserts like tiramisu with citrus liqueur or berry charlottes.
If aiming for a deeper richness, try folding in a small amount of finely ground hazelnuts or almonds (10–15 g / 1 tbsp). This adjustment introduces a slight nuttiness and enhances the color and texture of the final product, while still preserving the biscuit’s structural integrity.
For those who prefer a less sweet option, reducing the sugar by 10–15% can mellow the overall sweetness without impacting the rise. However, sugar is also crucial for stabilizing the meringue, so the amount should not be cut too drastically.
Why homemade ladyfingers always taste better
Freshly baked ladyfingers offer something that no store-bought version can replicate: control over texture and flavor. Commercial options are often overly dry, loaded with preservatives, or too rigid for delicate layered desserts. When made at home, the outer crust is lightly crisp but yields to a soft, spongy interior—exactly what you want when soaking them in espresso or liqueur.
Moreover, the process of whipping egg whites and folding them into the yolk mixture creates a naturally aerated sponge that is hard to replicate in mass production. The homemade version is lighter, absorbs liquids more gracefully, and offers a gentle vanilla-forward aroma that enhances desserts instead of overpowering them.
Common mistakes to avoid when making ladyfingers
Although the recipe appears straightforward, several common pitfalls can affect the final outcome:
- Overmixing the batter after folding in the flour can deflate the volume, leading to flat or rubbery biscuits.
- Underbeating the egg whites results in insufficient lift, making the ladyfingers dense rather than airy.
- Piping inconsistent shapes or spacing too closely causes uneven baking or merging biscuits.
- Skipping the powdered sugar dusting before baking can lead to a dull appearance and miss out on the classic slightly glazed surface.
- Opening the oven door early disrupts the rising process and may cause them to collapse.
Paying close attention to technique and respecting the role of each ingredient is key to avoiding these errors.
Healthier alternatives for dietary adjustments
For a lower-carb or gluten-free version, substitute regular flour with a certified gluten-free baking blend or finely sifted almond flour. Be aware that almond flour will result in a denser biscuit and may not hold shape as firmly, but the flavor it adds is pleasantly nutty.
To reduce sugar, use a natural sweetener like erythritol or coconut sugar, though it’s important to note these substitutes behave differently when baking. Erythritol, for example, doesn’t caramelize in the same way, so the color and surface finish may vary.
Egg-free versions can be attempted using aquafaba (chickpea brine), which mimics egg whites when whipped. This adjustment is tricky but possible with precise ratios and the addition of baking powder for structure.
Small upgrades that make a big difference
Beyond the recipe, the tools and technique can enhance the final product. For example, using a metal mixing bowl for egg whites helps maintain stability during whipping. Sifting dry ingredients thoroughly ensures a smoother batter and prevents clumps. Chilling the piped batter for a few minutes before baking can help the shape hold better in the oven.
If making ladyfingers for immediate use in a dessert like tiramisu, underbake them slightly so they remain softer. If baking for storage, a few extra minutes will create a sturdier, crunchier biscuit.
You can also experiment with lightly brushing the baked biscuits with flavored syrups (after they cool), turning them into a delicate standalone treat or a more decadent layer in a mousse dessert.
Flavors to pair with custom variations
If you’ve enhanced the ladyfingers with lemon zest or orange essence, consider pairing them with mascarpone mousse, citrus curds, or fresh berries. Nutty versions pair beautifully with coffee cream, praliné, or chocolate ganache. Adding warm spices like cinnamon or cardamom brings out a festive dimension, especially in holiday versions of tiramisu.
This flexibility shows how a single recipe, when customized thoughtfully, can adapt across seasons, occasions, and dietary needs. Whether you’re sticking to the original or turning it into a creative signature, homemade ladyfingers remain a versatile base with endless potential.
Allergens present in the recipe:
- Eggs
- Wheat (gluten)
Suggestions for allergen-free alternatives:
- Replace eggs with a mixture of aquafaba (chickpea water) and baking powder (3 tbsp aquafaba + ¼ tsp baking powder per egg) for structure.
- Use gluten-free all-purpose flour blend to eliminate gluten. Ensure cornstarch is certified gluten-free.
Vitamins and minerals per serving (approximate):
- Vitamin A: 65 µg – supports eye health and immune system
- Vitamin B2 (Riboflavin): 0.15 mg – essential for energy metabolism
- Vitamin B12: 0.3 µg – important for nerve function and red blood cell formation
- Calcium: 14 mg – supports bone health
- Iron: 0.6 mg – important for oxygen transport
- Phosphorus: 45 mg – supports bone structure and energy storage
- Selenium: 4 µg – antioxidant protection and thyroid function
- Zinc: 0.4 mg – supports immune defense and wound healing
Antioxidants per serving (approximate):
- Lutein + Zeaxanthin: 45 µg – protect eyes from oxidative stress
- Selenium: 4 µg – contributes to protection against cellular damage
- Vitamin A (as retinol equivalents): 65 µg – antioxidant and immune regulator
- Choline (egg yolk): 65 mg – important for brain health and cell membrane integrity
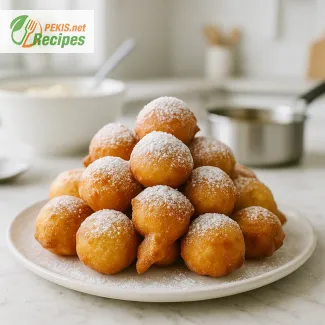
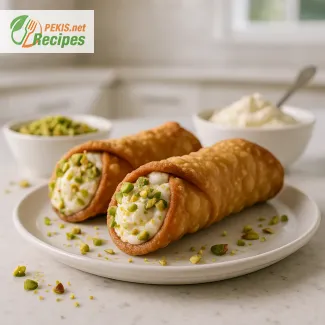
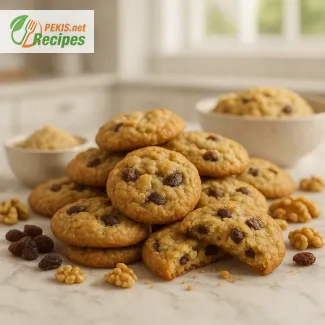
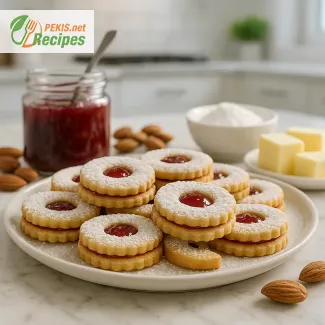
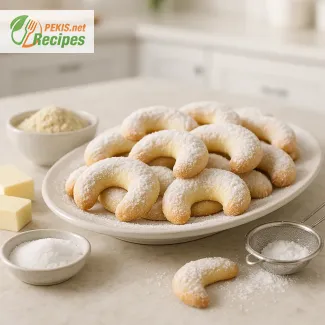
Recipes worth trying