Mastering the Art of Effortless Bread Baking at Home
Discover the rustic charm and perfect crust of no-knead artisan loaves
In the world of homemade bread, few techniques have revolutionized home baking like the no-knead method. This style of breadmaking has gained immense popularity due to its simplicity, minimal active time, and remarkably satisfying results. With only a handful of basic ingredients and an overnight rest, even novice bakers can achieve a crusty artisan bread with a chewy interior and deep, golden color. The appeal lies not just in the texture or taste, but in the meditative slowness of letting the dough do its own work.
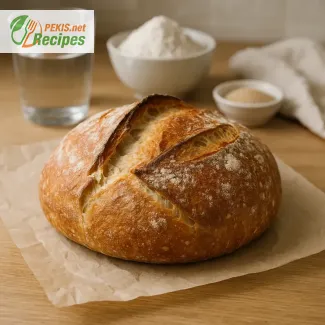
What sets a no-knead artisan bread recipe apart is its reliance on time and hydration rather than elbow grease. By allowing the dough to ferment slowly at room temperature, gluten develops naturally, resulting in an open crumb and complex flavor profile typically associated with professional bakeries. The crunchy crust—a hallmark of artisan-style loaves—is achieved by baking the dough inside a preheated Dutch oven, creating the steam needed for a bakery-quality finish.
Why home bakers love the no-knead approach
The rise of interest in crusty homemade bread has coincided with a growing desire for simplicity and authenticity in the kitchen. No-knead recipes are beginner-friendly yet deeply rewarding, offering a sense of craftsmanship without the intimidation of traditional techniques. This method allows for flexibility: the dough can rest overnight or up to 18 hours, adapting to your schedule while enhancing flavor through slow fermentation.
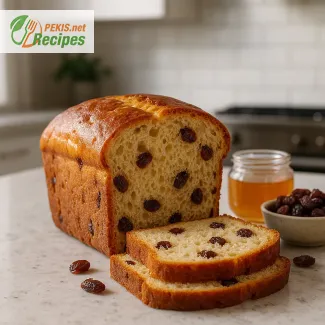
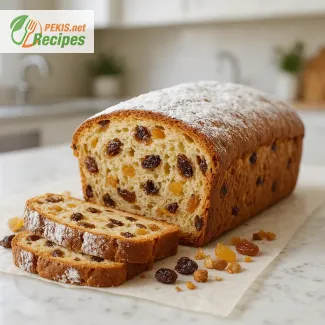
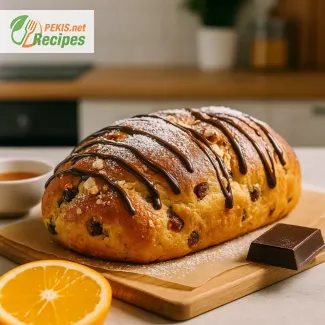
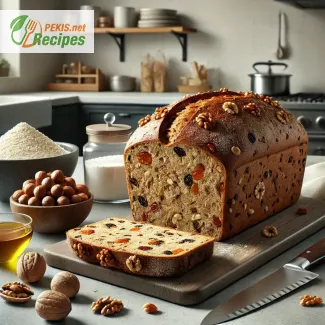
This type of bread also lends itself to experimentation. Once the basic structure is mastered, variations can include different flours, seeds, herbs, or dried fruits. Still, the classic white artisan loaf remains the most sought-after—its combination of crisp crust, airy interior, and rich aroma makes it a staple for everything from rustic sandwiches to simple slices with butter.
The essential tools for perfect no-knead artisan bread
Dutch oven: your secret to a crispy crust
One of the defining elements of artisan no-knead bread is the signature crust, which is best achieved using a heavy, lidded Dutch oven. This vessel traps steam during the initial bake, allowing the loaf to rise fully and form a crackling surface before the lid is removed for final browning. If you don’t have a Dutch oven, an oven-safe pot with a tight-fitting lid or even a cast iron combo cooker can be excellent alternatives.
High hydration dough: the key to open crumb
No-knead doughs typically contain a higher water content than traditional bread doughs. This increased hydration encourages gluten development without kneading and supports the formation of large, irregular air pockets. While sticky and slightly more difficult to handle, this kind of dough rewards patience with the light texture and chewy bite that define artisan-style loaves.
Ingredients that deliver exceptional texture and flavor
The foundation of every great homemade artisan bread is quality ingredients. Unbleached all-purpose flour or bread flour offers the right balance of protein and softness, while a small amount of instant yeast initiates fermentation. Salt is essential for structure and flavor, and water binds it all together. Some bakers prefer to use filtered water to avoid chlorine, which can affect yeast performance.
The beauty of this minimalist recipe is its reliance on natural fermentation for flavor. The slow, overnight proofing brings out subtle notes of nuttiness and tang, often compared to mild sourdough, without needing a starter. The result is a loaf with depth of flavor, rustic appearance, and authentic texture, perfect for sharing or savoring alone.
Texture, crust, and crumb: the hallmarks of artisan bread
True artisan bread is known for its dramatic contrast between a crisp, blistered crust and a soft, chewy interior. When baked properly, the loaf will emit a crackling sound as it cools, a telltale sign of a well-developed crust. Inside, the crumb should show an open, irregular structure with translucent walls, indicating optimal hydration and fermentation.
These textural qualities not only elevate the eating experience but also make the bread more versatile. Whether used as a base for bruschetta, dipped into olive oil, or served with cheese, the structure holds up beautifully while remaining tender and inviting.
The rise of no-knead bread in modern kitchens
In recent years, the no-knead artisan bread method has experienced a resurgence among home cooks seeking both simplicity and authenticity. As more people embrace traditional techniques with modern convenience, this recipe has become a cornerstone of the home baking repertoire. It delivers professional-quality results with minimal tools, time, or expertise, democratizing what was once the domain of master bakers.
The method’s flexibility makes it especially popular: you can mix the dough in the evening, let it rest overnight, and bake a fresh loaf the next morning with almost no effort. Its adaptability also allows for seasonal or regional twists, incorporating local grains, nuts, or even olives for a Mediterranean flair.
This style of bread is more than just a culinary trend—it's a return to authentic homemade food, crafted with intention, time, and just the right touch of science.
- Mix the dough: In a large mixing bowl, combine all-purpose flour, salt, and instant yeast. Pour in the water and stir using a wooden spoon or silicone spatula until a shaggy, sticky dough forms. No kneading is required.
- First rise (bulk fermentation): Cover the bowl with plastic wrap or a clean kitchen towel. Let it rest at room temperature for 12 to 18 hours. The dough should double in size, become bubbly on the surface, and slightly pull away from the sides.
- Shape the dough: Lightly flour a clean surface. Turn the dough out and fold it inwards a few times to form a loose ball. Avoid deflating it too much. Let it rest for 30 minutes covered with a towel.
- Second proof: While the dough rests, place a Dutch oven (or heavy lidded pot) into the oven and preheat to 230°C (450°F) for at least 30 minutes. Carefully place the dough onto parchment paper, reshape slightly, and lightly dust the top with flour.
- Bake the bread: Transfer the dough with the parchment paper into the hot Dutch oven. Cover with the lid and bake for 30 minutes. Then remove the lid and bake for another 15 minutes until deep golden and crusty.
- Cool before slicing: Remove the bread and let it cool completely on a wire rack (at least 1 hour) to finish the cooking process and avoid gummy texture.
Elevating Your Homemade Bread: Smart Tweaks for a Perfect Artisan Loaf
How to enhance crust, flavor, and structure with easy ingredient swaps
Baking no-knead artisan bread at home is already a fulfilling and delicious achievement. But once you've mastered the core technique, it’s only natural to start asking how to make it even better. Whether you're aiming for a deeper crust, a more complex flavor, or improved nutritional value, there are countless ways to upgrade this already exceptional recipe. The beauty of homemade bread lies in its adaptability—small changes in flour type, hydration, or baking techniques can have a major impact on the final result.
Adding whole grains for richer flavor and nutrition
Incorporating whole wheat flour into your no-knead dough can dramatically boost the nutritional profile. Whole grains bring in extra fiber, B vitamins, and nutty undertones that give the bread a rustic depth. Start by substituting 20–30% of the all-purpose flour with whole wheat, as going higher may reduce rise and create a denser crumb. To compensate, slightly increase the water content—whole wheat absorbs more moisture, and higher hydration helps maintain a chewy, tender texture.
Using sourdough starter for enhanced aroma
For a more complex, tangy flavor, consider replacing the instant yeast with a small amount of sourdough starter. This change requires a longer proofing time and a bit more attention, but the rewards are significant. A naturally leavened loaf develops aromatic notes, better keeping quality, and a more elastic crumb. Keep in mind that hydration levels and fermentation times will need adjusting, and working with a mature starter is crucial to success.
Enhancing the crust with steam and baking techniques
The hallmark of artisan-style bread is the thick, crackly crust. While a Dutch oven creates the ideal steam environment, you can improve results further by spritzing the dough lightly with water before baking or placing a tray of hot water at the bottom of your oven. Extending the uncovered baking time by 5–10 minutes at a slightly lower temperature can also result in a deeper golden hue and more pronounced blistering.
To add extra crunch and visual appeal, dust the top of the loaf with rice flour before scoring. It won’t darken as quickly and helps highlight the dramatic split marks created by oven spring.
Infusing flavor with seeds, herbs, or roasted garlic
Once you've nailed the base dough, you can begin exploring flavor add-ins that still maintain the bread’s structure. Try folding in toasted sesame seeds, rosemary, or chopped sun-dried tomatoes during the shaping phase. Ingredients like roasted garlic cloves or caramelized onions elevate the loaf into a centerpiece-worthy dish. Just make sure to drain and dry any wet additions thoroughly to avoid altering the dough’s hydration balance.
Common mistakes to avoid in no-knead bread baking
Despite its simplicity, there are pitfalls that can compromise your results. One of the most common issues is underproofing—if the dough hasn’t rested long enough, it won’t develop proper structure and will taste flat. On the other hand, overproofing (especially in warm kitchens) can cause the dough to collapse when transferred to the oven.
Another issue is using too much flour during shaping. The dough should be sticky; over-flouring can tighten the surface and prevent the open crumb structure you're aiming for. Also, failing to preheat your Dutch oven thoroughly may result in a pale crust and limited oven spring. Be patient and allow a minimum of 30 minutes of preheating time.
Choosing healthier ingredients without compromising quality
For those looking to make this bread part of a healthier lifestyle, replacing some of the all-purpose flour with spelt or rye flour offers more micronutrients and antioxidants. These flours tend to produce denser loaves, so blending them with white flour helps maintain a balanced texture. You can also add ground flaxseed or chia seeds to the dough for additional fiber and omega-3s.
Reducing the salt content by 10–15% is another small adjustment that doesn’t affect flavor dramatically, especially when complemented by aromatic mix-ins like herbs or a sourdough starter. And for gluten-sensitive individuals, a mix of gluten-free flour blends—specifically those formulated for artisan baking—can be used with the addition of psyllium husk to simulate the stretch of gluten.
Why homemade bread always wins
When compared to store-bought loaves, homemade artisan bread is superior in every respect: freshness, control over ingredients, and sensory experience. The warm aroma of baking bread, the crackle of the crust as it cools, and the satisfaction of slicing into a loaf you crafted by hand are all part of the ritual. Commercial options often contain preservatives and stabilizers, while your kitchen allows for full transparency and freedom.
This type of bread not only tastes better, but it also reconnects you with a slower rhythm of food preparation—one that values time, simplicity, and attention to detail. With a few thoughtful modifications, you can transform an already excellent recipe into something extraordinary and uniquely yours.
Allergens present in the recipe:
- Gluten: Present in wheat flour.
Substitution tips:
- To make the bread gluten-free, substitute with a certified gluten-free bread flour mix designed for yeast baking.
- No other common allergens like eggs, dairy, nuts, or soy are present.
Vitamins and minerals per serving (approximate):
- Vitamin B1 (Thiamine): 0.2 mg – supports energy metabolism and nervous system function.
- Iron: 1.5 mg – essential for oxygen transport in the blood.
- Magnesium: 20 mg – contributes to muscle function and bone health.
- Zinc: 0.5 mg – important for immune support and enzyme function.
- Selenium: 8 µg – acts as an antioxidant and supports thyroid health.
Antioxidants per serving (approximate):
- Ferulic acid: 7 mg – found in wheat bran; helps protect cells from oxidative stress.
- Lutein: 0.3 mg – supports eye health and protects against cellular damage
Recipes worth trying