Master the Art of Rustic Baking with This Timeless Loaf
The charm of traditional sourdough: technique, flavor, and texture in perfect harmony
There's something deeply satisfying about baking a classic sourdough bread—the slow fermentation, the tangy depth of flavor, the golden crust that shatters under a knife, and the chewy, open crumb that’s perfect for both savory and sweet toppings. This traditional sourdough bread recipe pays homage to age-old methods while fitting seamlessly into the rhythms of modern kitchens. Whether you're an experienced baker or taking your first steps into wild yeast fermentation, this guide invites you to explore the craft and reward of baking your own sourdough at home.
Sourdough bread is much more than just a trend—it's a living tradition with roots that trace back thousands of years. Unlike commercially leavened loaves, sourdough relies on a naturally cultivated starter—a symbiotic culture of wild yeasts and lactobacilli—to raise the dough and develop that signature flavor profile. The result is a bread that not only tastes better but also keeps longer and offers a satisfying bite that no store-bought loaf can match.
The sourdough experience: why bakers keep coming back
A process that rewards patience and practice
The journey to the perfect sourdough loaf begins with understanding fermentation. At the heart of every sourdough is the starter, a simple mixture of flour and water that, when properly nurtured, becomes a bubbling powerhouse of leavening. Over time, this starter becomes more complex in flavor and stronger in performance, giving rise to bread that’s uniquely yours.
One of the most compelling aspects of sourdough baking is its rhythm—a slow, deliberate process that brings you closer to the ingredients and demands attention to detail. Autolyse, bulk fermentation, shaping, proofing—all these stages play a critical role in the final structure and taste. And while the process might seem intimidating at first, it’s incredibly rewarding once you experience your first successful bake.
Flavor, texture, and aroma: a loaf like no other
What sets sourdough apart from other breads?
Every baker knows that a good bread is defined by its flavor, texture, and aroma. Classic sourdough excels on all three fronts. Its distinctive tang comes from the lactic and acetic acids developed during fermentation. These compounds not only give sourdough its pleasantly sour taste but also help preserve the loaf naturally.
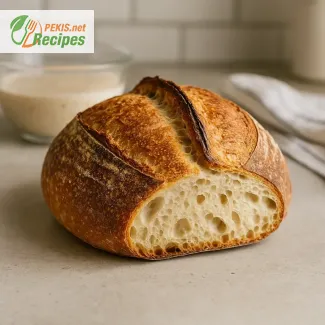
The crust is another defining element. Thanks to high hydration and proper baking techniques, the outer layer becomes deeply caramelized, shatteringly crisp, and rich in color. Inside, the crumb is irregular and airy—those sought-after “open holes” are a hallmark of well-executed sourdough, offering a chewy yet tender bite that makes each slice memorable.
Aromatically, few breads compare. The moment you slice into a fresh sourdough loaf, you’re greeted with a warm, complex scent that reflects both the natural fermentation and the flour’s origin. It’s earthy, slightly nutty, and unmistakably homemade.
The beauty of simplicity: just three ingredients
Flour, water, and salt—transformed through time and care
One of the most powerful truths about classic sourdough bread is that it requires just three ingredients: flour, water, and salt. There’s no commercial yeast, no sugar, no fat—just time and technique. The flour feeds the wild yeast and bacteria, water activates the process, and salt controls fermentation and strengthens the gluten network.
Despite this simplicity, each batch can produce a different result, influenced by ambient temperature, flour choice, and fermentation timing. This variability is not a flaw—it’s a feature. It’s what makes sourdough a craft rather than a formula, encouraging bakers to stay curious and refine their skills with every bake.
Tools and techniques for success
What every home baker needs to make sourdough like a pro
To bake a great sourdough bread, you don’t need a professional kitchen, but having the right tools makes a difference. A digital kitchen scale is essential for precision. A proofing basket (banneton) helps the dough hold its shape during final fermentation. A dutch oven or baking stone creates the steam and high heat necessary for a bold oven spring and a crusty exterior.
Equally important are techniques: stretch and folds to build gluten strength, cold proofing to deepen flavor, and scoring to guide expansion during baking. Each of these contributes to the final look and feel of the loaf.
By investing time and attention to detail, any baker can achieve those coveted results—a golden crust, complex flavor, and a perfect crumb structure.
A ritual that connects past and present
Rediscovering tradition through fermentation
In a world of fast-paced meals and mass-produced products, sourdough offers a different narrative. It invites you to slow down, to connect with the ingredients, and to embrace the ritual of baking. Sharing a loaf of sourdough—still warm from the oven, sliced thick, and paired with good butter or cheese—is one of life’s simplest and most satisfying pleasures.
Sourdough baking is as much about nourishment as it is about creativity. It teaches patience, respect for nature’s timing, and a deeper understanding of food. Whether you’re baking for family, friends, or just yourself, each loaf tells a story of care, transformation, and flavor that can’t be rushed or replicated.
The following recipe is a result of years of experimentation, refinement, and tradition.
Step 1 – Autolyse (20 minutes)
In a large mixing bowl, combine the flour and water. Mix until no dry bits remain. Cover and let it rest at room temperature for 20 minutes. This autolyse step allows the flour to fully hydrate and begin gluten development.
Step 2 – Add sourdough starter and salt (5 minutes)
Add the active sourdough starter and salt to the dough. Knead gently or use the "pinch and fold" method to incorporate thoroughly. The dough will feel sticky at this stage.
Step 3 – Bulk fermentation and stretch & folds (4 hours)
Let the dough rest in the bowl, covered with a damp cloth or lid. Over the next 4 hours, perform 4 sets of stretch and folds, spaced 30 minutes apart. To do this, wet your hand, pull one side of the dough up and fold it over to the opposite side. Rotate the bowl and repeat on all four sides.
Step 4 – Bulk rest (2–4 hours more)
After the last stretch and fold, allow the dough to continue fermenting at room temperature until it has risen noticeably (but not doubled), showing bubbles along the surface and sides.
Step 5 – Shaping (10 minutes)
Lightly flour your work surface. Gently turn the dough out, shape it into a round (boule) or oval (batard) form. Use a bench scraper if needed. Let it rest for 20 minutes uncovered (bench rest), then do a final shaping and place the dough seam-side up into a floured proofing basket (banneton).
Step 6 – Cold proofing (overnight: 8–12 hours)
Cover the basket with a plastic bag or reusable cover and refrigerate for 8 to 12 hours. This cold fermentation enhances the flavor and helps achieve a more open crumb.
Step 7 – Scoring and baking (45 minutes)
Preheat your oven to 250°C (480°F) with a Dutch oven inside. When ready to bake, turn the dough onto a piece of parchment paper. Score the top with a sharp razor or lame. Carefully place the dough into the hot Dutch oven, cover with the lid, and bake for 20 minutes. Remove the lid and bake for another 25 minutes or until the crust is deeply golden and crisp.
Step 8 – Cooling (minimum 1 hour)
Remove the bread from the oven and place it on a wire rack. Let it cool for at least 1 hour before slicing to allow the crumb to set properly.
Elevating Your Homemade Sourdough: Expert Tweaks and Flavorful Variations
Discover how small changes create big improvements in your classic sourdough loaf
The journey to a truly memorable homemade sourdough bread doesn’t end with mastering the basic recipe. In fact, the magic of sourdough lies in its flexibility—its ability to evolve with each bake, each season, and each baker’s unique touch. Whether you’re seeking to intensify the flavor, improve the texture, or make your bread more nourishing, this guide explores smart, ingredient-focused tips and technique-based advice to take your loaf from good to exceptional.
Understanding how flour variety affects taste and structure
While strong white bread flour is the classic choice for traditional sourdough, experimenting with other flours can add character and complexity to your loaf. Whole wheat flour, when used in part (e.g., 20–30%), brings a nutty depth and boosts the fiber content. However, too much can weigh down the crumb, making the bread denser.
Rye flour is another excellent option, often added in small amounts (5–10%) to enhance fermentation and introduce earthy undertones. If you’re aiming for a richer flavor, combining white, whole wheat, and rye flour creates a balanced loaf with both lightness and complexity.
Adding spelt or kamut flour can contribute a slightly sweet, buttery aroma, though these ancient grains are lower in gluten and may require gentle handling. Always remember: changing the flour blend impacts water absorption, so adjust hydration as needed.
Hydration tweaks for better crust and open crumb
The amount of water in your dough—known as hydration—dramatically affects the final loaf. A higher hydration dough (above 75%) leads to a more open crumb with larger holes and a softer interior. However, it can also be trickier to handle, especially for beginners.
For a balance between ease and aesthetics, try increasing hydration slowly by increments of 10 ml. If your recipe originally calls for 350 ml of water, test with 360–370 ml and assess how your dough responds. With practice, wetter doughs can yield stunning results.
Using warm water during mixing (around 26–28°C or 79–82°F) can also speed up fermentation slightly and help with gluten development during colder months.
Boosting flavor through fermentation and technique
If you crave a more pronounced tangy flavor, extend the cold fermentation time in the refrigerator. Instead of 8–12 hours, you can proof your shaped dough for up to 24 hours at 4°C (39°F). The extended time allows acetic acid to develop more fully, giving you that iconic sour bite.
Incorporating a levain build (feeding a portion of your starter separately a few hours before mixing your dough) adds freshness and boosts activity. This step also gives you more control over flavor, as you can adjust fermentation time and flour ratio to influence the acidity and strength of the levain.
Adding a soaker or porridge (like cooked oats or seeds soaked in water) to your dough can result in a moister, richer crumb. It also enhances nutritional value and texture. Just be sure to reduce the water in the main dough to account for the added moisture.
Creative additions for flavor and texture
Sourdough bread is the perfect canvas for a variety of flavorful additions. A few options to consider:
- Olives, roasted garlic, or caramelized onions – Add savory depth
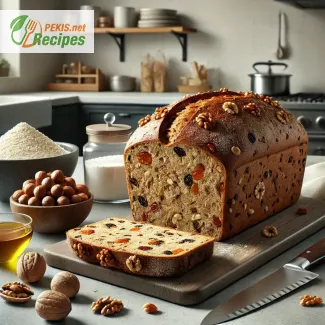
- Toasted seeds or nuts – Introduce crunch and visual appeal
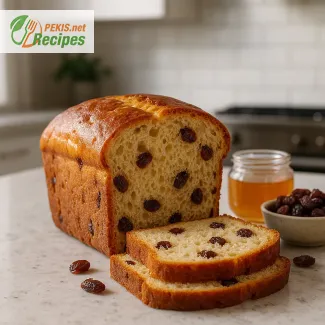
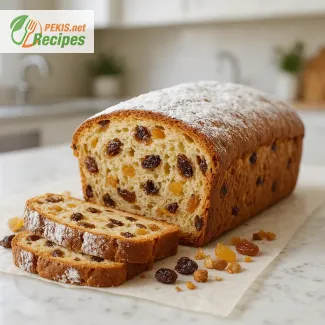
- Dried fruits and spices – For a sweeter variation, try figs, raisins, or cinnamon
Add these mix-ins after the first set of stretch and folds to prevent breaking down the gluten structure. Always ensure they’re dry or well-drained to avoid soggy dough.
Healthier substitutions and dietary considerations
For a more nutrient-dense loaf, consider reducing the salt slightly (to 8 g or 1 tsp) or using unrefined sea salt, which contains trace minerals. Incorporating more whole grain flours improves fiber and micronutrient content.
If you're baking for someone with gluten sensitivity (not celiac disease), using a higher fermentation time helps break down gluten proteins and may improve digestibility. For true gluten-free sourdough, opt for flours like brown rice, buckwheat, or sorghum, and use a dedicated gluten-free starter.
Using filtered water instead of tap can also improve consistency, especially in areas with high chlorine content, which may hinder fermentation.
Common mistakes to avoid
Even seasoned bakers run into issues that can impact the final result. Avoid these frequent errors:
- Underproofing: Results in a tight crumb and less oven spring. Look for a dough that has slightly domed in the basket and springs back slowly when pressed.
- Overproofing: Leads to collapse in the oven. Refrigerated dough should be baked within the ideal time window.
- Weak starter: Always ensure your starter is bubbly and has doubled in size before use. A sluggish starter produces flat, flavorless bread.
- Skipping the preheat: Baking in a fully heated Dutch oven ensures crust development and oven spring.
- Incorrect scoring: Use a sharp blade and decisive movement. Poor scoring can cause blowouts or uneven rise.
Why homemade sourdough is always worth it
Beyond the superior flavor and texture, baking sourdough at home lets you control the ingredients, avoid preservatives, and tailor each loaf to your taste or dietary preferences. The aroma that fills the kitchen, the satisfaction of shaping dough with your hands, and the sound of a crisp crust crackling as it cools—these experiences can’t be bought. Homemade sourdough connects you to an ancient tradition and gives you complete creative freedom to experiment, improve, and enjoy.
Allergens present in the recipe:
- Gluten (from wheat flour)
Suggestions to eliminate allergens and gluten:
- Replace strong white bread flour with a certified gluten-free flour blend suitable for sourdough baking. Add psyllium husk (10 g / 1 tbsp) to improve dough elasticity.
- Ensure the starter is also cultivated using gluten-free flour such as brown rice flour or buckwheat flour.
Vitamins and minerals per serving (approximate):
- Iron: 1.2 mg – Supports oxygen transport and reduces fatigue
- Magnesium: 18 mg – Aids in nerve function and muscle recovery
- Zinc: 0.5 mg – Boosts immune function and enzyme activity
- Vitamin B1 (Thiamine): 0.15 mg – Essential for energy metabolism
- Folate: 25 mcg – Important for cell division and DNA synthesis
- Phosphorus: 55 mg – Contributes to bone health and energy release
- Selenium: 7 mcg – Antioxidant protection and thyroid support
Antioxidants per serving (approximate):
- Ferulic acid: 12 mg – Neutralizes free radicals and supports skin health
- Lutein: 0.2 mg – Beneficial for eye health and visual performance
- Phytic acid: 5 mg – Antioxidant and mineral absorption regulator (reduced during fermentation)
Recipes worth trying