- Main goal: Firm molded no-bake cake pops that release cleanly from hinged plastic molds without crumbling.
- Time: 2 hr 45 min.
- Difficulty: 🟡 Medium, because the mixture must be firm enough to hold molded edges but moist enough to grip the stick.
- Key equipment: food processor, hinged plastic cake-pop molds, cake-pop stand.
- Mastery Tip: Chill the filled closed molds before unmolding; cold structure protects the seam and sharp edges.
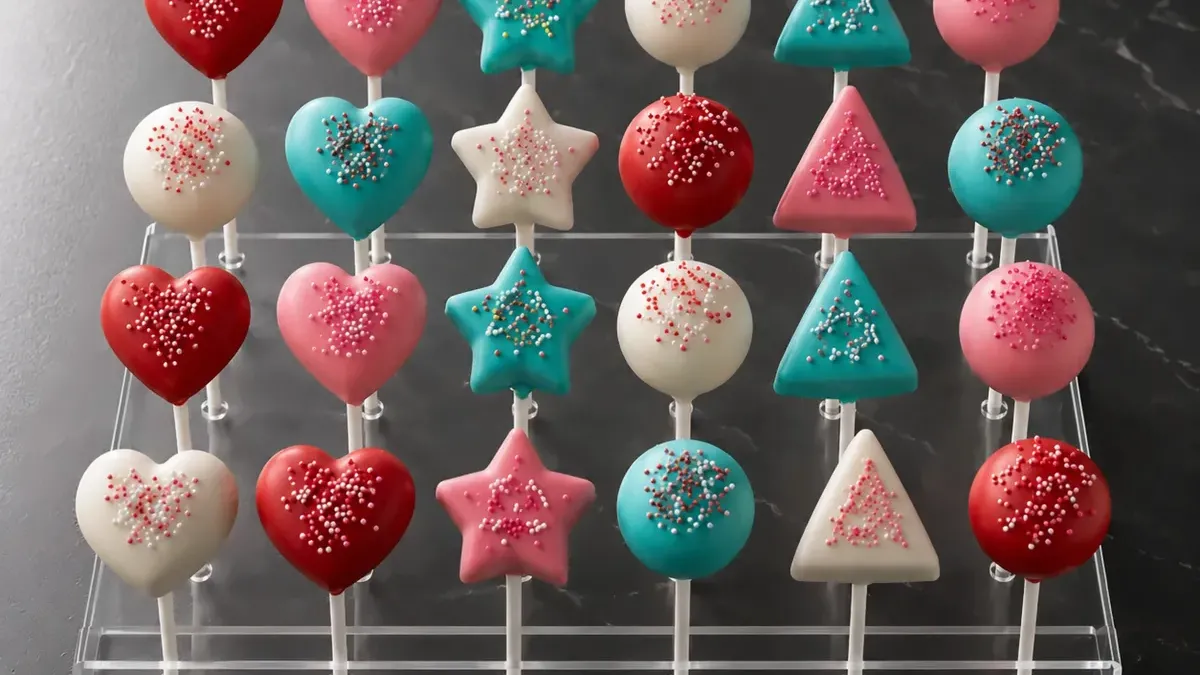
Why do molded no-bake cake pops crumble after chilling?
The firm-mixture fix: bind, rest, press, then coat
The trick is not more frosting — it is controlled moisture. These molded no-bake cake pops hold because fine crumbs are mixed with a dense binder, rested cold, compressed in hinged plastic cake-pop molds, and coated only after the sticks have set.
For the core cake-pop method, keep the full guide to firm centers and a smooth shell close. This version focuses on hinged plastic molds, bright coating colors, and a mixture that does not crack when unmolded.
Quick tips
- Process the cake into fine crumbs, not chunks; large pieces create weak spots inside hearts, stars and triangles.
- Add the binder in stages; a wet paste smears in the plastic mold, while a dry mix breaks at the seam.
- Rest the mixture before molding; cold fat firms up and the crumbs absorb moisture evenly.
- Anchor the sticks before dipping; coating around the stick acts like edible glue and stops the pop from spinning.
[Critical step] Pulse 420 g trimmed vanilla sponge cake in a food processor until the crumbs are even and fine. Remove dry crusts first because they do not absorb binder at the same rate as the soft crumb.
[Kitchen signal] The crumbs look like soft sand, with no cubes larger than 3 mm.
[Failure consequence] Large cake pieces leave hollow weak points, so the shaped cake pops crack at the corners when unmolded.
[Critical step] In a 1-liter bowl, press 120 g cream cheese, 35 g softened butter, 45 g icing sugar, 10 ml vanilla and 1.5 g salt together with a silicone spatula until smooth and thick. Do not whip it.
[Kitchen signal] The binder leaves a smooth ridge on the bowl wall and does not run back immediately.
[Failure consequence] Whipped or runny binder traps air and softens the mixture, so the cake pops smear inside the plastic molds and lose clean edges.
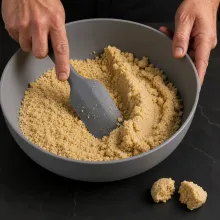
[Critical step] Add the binder to the crumbs in three additions, folding and pressing after each addition. Stop when a squeezed portion holds a clean fracture without smearing your fingers.
[Kitchen signal] A 25 g piece compresses into a firm lump, breaks cleanly, and does not shed dry crumbs.
[Failure consequence] Too little binder makes the edges crumble; too much binder makes the shaped pops taste heavy and slide off the sticks.
[Critical step] Cover the bowl closely and chill the mixture for 20 min at 4°C / 39.2°F. This rest lets the crumbs absorb moisture while the butter and cream cheese firm up.
[Kitchen signal] The mixture feels cooler, less sticky and slightly denser when pressed.
[Failure consequence] If molded immediately, the fat is too soft and the seam tears when the plastic mold opens.
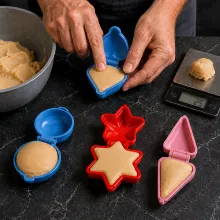
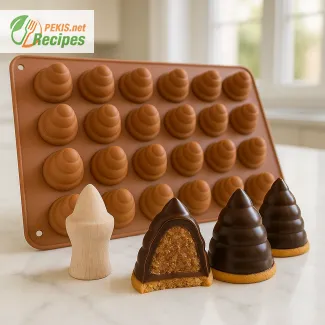
[Critical step] Weigh 25 g mixture for each cavity and press it into the lower half of the hinged plastic cake-pop mold. Fill the edges and corners first, then close the top half and press the mold shut until the mixture compacts into a firm shape. Open one mold to check that the shape is filled cleanly, then close it again before chilling.
[Kitchen signal] The mold closes without heavy overflow, the seam is filled, and the opened test shape has clean edges with no hollow corners.
[Failure consequence] If the mold is underfilled, the shaped cake pop has weak edges and crumbles; if it is overfilled, the seam bulges and the coating later forms an uneven ridge.
[Critical step] Chill the closed hinged plastic molds for 35 min at 4°C / 39.2°F. Open one mold gently and lift out one shape to test release before unmolding all of them.
[Kitchen signal] The shape releases with clean edges, a neat seam, and does not bend in the middle.
[Failure consequence] Warm shapes flex and crack when the plastic mold opens, so the coating later exposes crumbs at the edges.
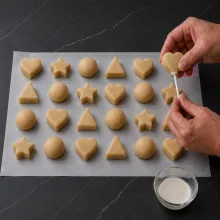
[Critical step] Melt 80 g of the coating until fluid, then dip 1 cm of each stick into it and insert the stick halfway into each chilled shape. Chill for 15 min at 4°C / 39.2°F.
[Kitchen signal] A small neat coating ring forms at the stick entry and the stick stands straight.
[Failure consequence] Without this anchor, the cake pop twists or falls into the coating during dipping.
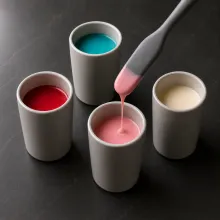
[Critical step] Melt the remaining coating with 22 g refined coconut oil or cocoa butter, keeping it fluid but not hot. Aim for 38–40°C / 100.4–104°F for candy melts, or 34–36°C / 93.2–96.8°F for white chocolate coating. Divide into small deep dipping cups and color with oil-based coloring, leaving one portion white.
[Kitchen signal] The coating falls from the spatula in a smooth ribbon and closes back into the surface within 3 seconds.
[Failure consequence] Thick coating drags on the molded edges and breaks them; overheated coating melts the binder near the stick.
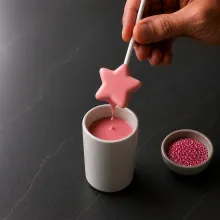
[Critical step] Let the anchored cake pops stand at room temperature for 10 min before dipping, so the surface is cold but not icy. Dip each shape straight down, lift it slowly, then rotate once and let 1–3 slow drips fall back into the dipping cup. Add sprinkles while the coating is still tacky.
[Kitchen signal] The coating covers the corners in a thin layer and stops dripping before the cake pop goes into the stand.
[Failure consequence] If the pops are too cold, the shell cracks; if they are too warm, the shape loosens on the stick.
[Critical step] Place each dipped cake pop upright into a cake-pop stand and chill for 20 min at 4°C / 39.2°F. Then rest at room temperature for 10 min before serving so the shell is dry but not brittle.
[Kitchen signal] The coating is dry to the touch, the sticks stay vertical, and the bases do not form puddles.
[Failure consequence] If the cake pops set lying down, one side flattens and the shell loses its clean molded shape.
Test diary: The first weak batch broke at the star tips because the hinged plastic molds were opened before the mixture was cold enough. The fix was simple but decisive: 20 min chilling before pressing and 35 min chilling in the closed molds. Cold fat tightened the binder, the crumbs absorbed moisture evenly, and the shapes released with sharper edges. Signature check: open one mold first; the shape must release with a clean seam and no bending.
Chef PEKIS – professional chef and recipe developer with over 25 years of hands-on experience. I refine classic techniques into reliable, repeatable results for the home kitchen.
FAQ questionWhy do no-bake cake pops crumble after molding?
They crumble when the mixture is too dry, uneven, or under-compressed in the hinged plastic mold. Large cake crumbs leave weak pockets, while binder added all at once creates wet and dry zones. The physical signal is a shape that cracks at the seam, loses corners, or sheds crumbs when unmolded.
FAQ questionCan I make these molded no-bake cake pops without cream cheese?
Yes, but the texture changes. Mascarpone gives a softer bite, while buttercream makes the mixture sweeter and less firm. The signal to watch is the squeeze test: the mixture must hold pressure without leaving greasy smears.
FAQ questionWhy does the coating crack after chilling?
The pop is usually too cold. A very cold center contracts and shocks the coating as it sets. Rest the anchored pops for 10 min at room temperature before dipping; the surface should feel cool, not icy.
FAQ questionCan I use regular gel food coloring in white chocolate?
Only use oil-based coloring. Water-based gel can seize melted chocolate because water tightens the sugar and cocoa-fat structure. The signal is instant graininess or a thick paste instead of a smooth ribbon.
FAQ questionHow do I keep the sticks from spinning?
Anchor them with melted coating first. Dip 1 cm of the stick, insert it halfway, then chill until the ring is firm. That small set ring locks the stick to the dense center before the dipping weight pulls on it.
Store the finished cake pops in a covered container in the refrigerator for up to 4 days. For the best texture, serve them after 10–15 min at room temperature; the center softens slightly while the shell stays clean and dry. Do not reheat them. If condensation forms, leave the lid slightly open for 5 min before serving so moisture does not dull the coating.
For a darker chocolate version, use the method from chocolate cake pops. For a faster cookie-style variation, No Bake Oreo Cake Pops uses a denser crumb base.
- Allergen: Milk — use dairy-free cream cheese, plant butter and dairy-free coating — the center sets softer, so chill 10–15 min longer.
- Allergen: Wheat / gluten — use gluten-free vanilla sponge — the crumb is often more fragile, so add binder slowly and press firmly into molds.
- Allergen: Soy — choose soy-free coating melts — the coating may be thicker and need 2–4 g extra cocoa butter.
- Allergen: Egg — use egg-free sponge cake — the crumb has less elasticity, so the squeeze test becomes essential.
- Vitamin/mineral: Calcium — small amount from cream cheese and coating, usually below 10% DV — adds minor dairy-based mineral value, but this dessert is not a major calcium source.
- Vitamin/mineral: Iron — trace amount from sponge cake flour, usually below 10% DV — contributes minimally to daily intake.
- Vitamin/mineral: Sodium — about 80 mg per cake pop from salt, cake and cream cheese — supports flavor balance, but the recipe should stay moderate in salt.
- Antioxidant: Vanilla aroma compounds from vanilla extract — mainly flavor value, not a major antioxidant source — no baking keeps the vanilla notes clearer.
- Antioxidant: Natural color pigments, only if using oil-based natural colors — minor plant-compound contribution — heat-free use preserves color better than baked decoration.
- Antioxidant: White coating base — very low antioxidant value — gentle melting protects texture and flavor, but this recipe should not be treated as an antioxidant-rich dessert.
Calculators
Recipes worth trying