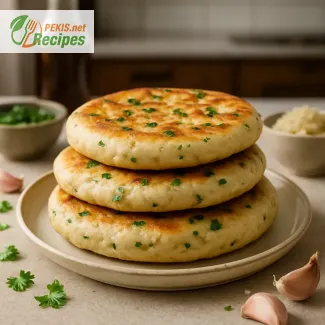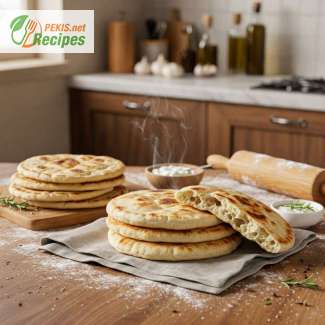
Mastering the Art of Homemade Pita Bread: The Perfectly Soft and Puffy Delight
The Joy of Freshly Baked Pita Bread
There’s something truly special about the aroma of freshly baked pita bread wafting through the kitchen. This simple yet incredibly versatile flatbread has been a staple in Middle Eastern and Mediterranean cuisine for centuries, loved for its soft texture and signature pocket that makes it perfect for stuffing. While store-bought pitas may be convenient, nothing compares to the taste and texture of a homemade version.
Making homemade pita bread is a rewarding experience, and with the right technique, you can achieve the perfect puff, resulting in light and airy pockets that are ideal for sandwiches, dips, or wraps. The process is surprisingly simple, requiring just a few basic ingredients and a hot oven or stovetop to create beautifully golden, pillowy pitas that will elevate your meals to the next level.
Why Homemade Pita Bread is Worth the Effort
Unlike commercial pita bread, which can often be dry and dense, homemade pitas have a delightful chewiness with a slightly crispy exterior. The key to achieving this perfect texture lies in a well-kneaded dough, proper resting time, and the right baking conditions. When done correctly, your pitas will puff up beautifully, creating a hollow pocket inside that makes them ideal for stuffing with a variety of fillings, from fresh vegetables and grilled meats to creamy hummus and rich sauces.
Another advantage of making your own pita bread is control over ingredients. Many store-bought versions contain preservatives and additives to extend shelf life, whereas homemade pitas are made with just a handful of simple, wholesome ingredients: flour, water, yeast, salt, and olive oil. This allows you to enjoy a healthier, fresher, and more authentic taste.
Key Secrets to Soft and Puffy Pitas
The key to achieving the perfect pita bread lies in a few essential techniques:
1. The Right Flour Matters
Using high-protein flour, such as bread flour, helps create the gluten structure necessary for the dough to rise properly. This results in a soft yet slightly chewy texture that makes the bread pliable and perfect for wraps.
2. Proper Kneading and Resting
Kneading the dough thoroughly activates the gluten, while allowing it to rest ensures the yeast has enough time to work its magic. The dough should be soft and elastic, which helps achieve the signature puff during baking.
3. High Heat is Essential
Pita bread needs to be cooked at a very high temperature, either in a preheated oven or on a hot skillet, to create steam inside the dough. This steam causes the bread to puff up, forming the classic pita pocket. If the oven or pan isn’t hot enough, the pita will remain flat and dense.
4. Rolling the Dough Evenly
To encourage even puffing, the dough should be rolled out to a consistent thickness of about 5 mm (¼ inch). If the dough is too thick, the pitas may not fully expand, while dough that is too thin may tear easily.
The Perfect Pairings for Homemade Pita Bread
Once you've mastered the art of making soft and puffy pita bread, the possibilities for enjoying it are endless. This versatile flatbread pairs wonderfully with both savory and sweet dishes:
- Classic Hummus and Dips – Freshly baked pitas are perfect for scooping up creamy hummus, baba ganoush, or tzatziki.
- Stuffed Sandwiches – Slice open the warm pitas and fill them with falafel, grilled chicken, lamb kebabs, or fresh Mediterranean vegetables.
- Wraps and Roll-ups – Use pita as a base for wraps, layering with spreads, proteins, and greens for a wholesome meal.
- Pizza-Style Pitas – Transform your pita bread into a mini pizza by adding tomato sauce, cheese, and toppings before baking.
- Sweet Treats – Try spreading warm pita with honey and cinnamon for a deliciously simple dessert.
Elevate Your Cooking with Homemade Pita Bread
Once you experience the taste and texture of homemade pita bread, you’ll never want to go back to store-bought versions again. With its light, airy texture and golden, slightly crisp exterior, this bread will quickly become a favorite in your kitchen. Whether you enjoy it warm from the oven, stuffed with flavorful ingredients, or dipped into your favorite spreads, homemade pita is a game-changer that adds an authentic touch to any meal.
Ready to start baking? Grab your ingredients, preheat your oven, and let’s make some perfectly puffy pita bread!
- Activate the yeast: In a bowl, combine warm water, sugar, and yeast. Stir gently and let it sit for 5-10 minutes until frothy.
- Mix the dough: In a large bowl, combine flour and salt. Add the yeast mixture and olive oil. Stir until the dough starts to come together.
- Knead the dough: Transfer the dough to a floured surface and knead for 8-10 minutes until it becomes smooth and elastic.
- First rise: Place the dough in a lightly greased bowl, cover with a clean cloth, and let it rise for about 1 hour or until doubled in size.
- Divide and shape: Punch down the dough and divide it into 8 equal pieces. Roll each piece into a ball and let them rest for 10 minutes.
- Roll out pitas: Roll each ball into a thin round, about 5 mm (¼ inch) thick.
- Cook the pitas: Preheat a dry pan or skillet over medium-high heat. Cook each pita for 1-2 minutes per side until they puff up and develop golden brown spots.
- Serve warm: Enjoy immediately or store in an airtight container for later use.
Elevating Homemade Pita Bread: Expert Tips for the Best Results
The Power of Ingredient Adjustments
While traditional pita bread recipes require just a few simple ingredients, small adjustments can make a significant difference in taste, texture, and nutritional value. Here are some ways to enhance your homemade pita bread:
Choosing the Right Flour
- Bread flour is typically used to achieve a chewy, structured texture, but for a softer result, you can mix in all-purpose flour.
- For a healthier alternative, replace 25-30% of white flour with whole wheat flour. This adds a nutty flavor and fiber, but too much can make the dough dense, so balance is key.
- Adding a small amount of semolina flour can create a slight crispiness while still keeping the inside soft and airy.
Enhancing Flavor with Natural Additions
- A splash of yogurt (around 1 tbsp per cup of flour) enhances tenderness and creates a slight tangy depth.
- Olive oil enriches the flavor and prevents the bread from drying out too quickly.
- Adding a pinch of garlic powder or dried herbs such as oregano, thyme, or rosemary infuses extra Mediterranean flavor, making the pitas more aromatic.
Mastering the Technique for the Perfect Puff
One of the most rewarding aspects of making pita bread at home is achieving that signature puff, which creates the hollow pocket inside. If your pitas aren’t puffing properly, try these adjustments:
Controlling Dough Hydration
- Dough that is too dry won’t steam properly to create the pocket, while too much water can make it too sticky.
- The ideal dough should be soft, slightly tacky, but not overly sticky when kneading. If needed, adjust with small amounts of water or flour.
Proper Rolling Techniques
- Rolling the dough too thick can prevent proper puffing. Aim for 5 mm (¼ inch) thickness for best results.
- Do not press too hard when rolling, as it may seal the layers and prevent air pockets from forming inside.
Getting the Heat Just Right
- For the best puff, the oven or skillet should be extremely hot (230-260°C or 450-500°F) before adding the dough.
- If using a skillet, covering it briefly with a lid can help trap steam, aiding in the expansion of the bread.
- If some pitas don’t puff, don’t discard them—they make excellent flatbreads for dips or wraps.
Why Homemade Pita Bread is Superior to Store-Bought
Freshly baked pita bread is vastly different from its store-bought counterpart, offering better flavor, texture, and flexibility.
- No preservatives – Commercial pita bread often contains additives to extend shelf life, affecting taste and freshness.
- Better hydration – Homemade pitas remain softer and pliable longer, while store-bought ones dry out quickly.
- Customizable flavors – You can experiment with spices, flours, and mix-ins to create unique variations.
Common Mistakes and How to Avoid Them
Making pita bread is straightforward, but small errors can lead to dense, dry, or non-puffing results.
Using the Wrong Flour
- All-purpose flour alone can result in less elasticity, leading to flat pitas.
- Too much whole wheat flour can make the dough heavy and reduce puffing.
Overworking or Underworking the Dough
- Kneading too little prevents gluten from developing, leading to weak dough that won’t rise properly.
- Over-kneading makes the dough too tight, causing resistance and lack of air pockets.
Incorrect Cooking Temperature
- A low oven temperature leads to flat, chewy pitas.
- Inconsistent heat in the skillet prevents even cooking, resulting in uneven puffing.
Healthier Alternatives for a Nutritious Pita Bread
If you’re looking for a healthier version of pita bread, try these ingredient swaps:
Whole Grain Pita
- Replace 30-50% of white flour with whole wheat flour for higher fiber and nutrients.
- Increase hydration slightly to balance the extra density of whole grains.
Gluten-Free Version
- Use a gluten-free flour blend with xanthan gum to mimic elasticity.
- Consider adding potato starch or psyllium husk for improved structure.
Low-Sodium Pita
- Reduce the salt content and compensate with herbs or garlic powder for flavor.
- Opt for sea salt or Himalayan salt for trace minerals.
Improving traditional pita bread comes down to ingredient quality, proper technique, and small modifications to suit your taste and dietary needs. Whether you aim for healthier variations, improved texture, or better flavor, experimenting with flour types, hydration, and baking methods can transform your homemade pita bread into a gourmet delight.
This recipe contains gluten due to wheat flour.
Ingredient substitution tips:
- To make it gluten-free, replace wheat flour with a gluten-free flour blend and add ½ tsp xanthan gum.
- If yeast is not available, use 1 tsp baking powder as a leavening agent, but the texture will be slightly different.
- Iron: 2 mg – Essential for oxygen transport in the blood.
- Calcium: 10 mg – Supports bone health.
- Magnesium: 20 mg – Helps with muscle and nerve function.
- Vitamin B1 (Thiamine): 0.1 mg – Supports energy metabolism.
- Selenium: 6 mcg – Protects cells from oxidative stress.
- Vitamin E: 0.3 mg – Helps maintain healthy skin and immune function.
- Phenolic compounds: Present in whole wheat flour versions, supporting heart health.
