Mastering the Craft of Artisan Sourdough Bread
Why this naturally leavened bread is worth every minute
There's something timeless about baking 100% natural sourdough bread — a ritual that connects us with centuries of tradition, craftsmanship, and patience. Unlike commercial yeast bread, sourdough relies solely on wild fermentation. This slow, natural process not only enhances flavor and texture, but also gives the bread a distinct crusty exterior, open crumb, and long-lasting freshness. For bakers at any level, creating an authentic sourdough loaf from scratch is both a technical challenge and a meditative experience.
The secret behind long-fermented flavor
The unique character of sourdough bread comes from its long fermentation. The naturally occurring lactic acid bacteria and wild yeasts work slowly to break down the flour, producing lactic and acetic acids that contribute a signature tang and deep aroma. The dough undergoes transformations over time, resulting in a robust structure and flavorful complexity that fast-rise breads simply can't replicate.
Choosing the right sourdough starter — well-fed, mature, and active — is crucial for success. An established starter brings stability to fermentation, helps achieve ideal rise and spring, and enhances digestibility. Proper fermentation also neutralizes some of the phytates in wheat, making minerals more bioavailable.
Ingredients make the difference
Even in its simplicity, natural sourdough bread demands quality. With just flour, water, and salt, each component must be carefully considered. Opt for organic stone-ground flours for better nutrient retention and flavor depth. Many experienced bakers prefer a mix of whole wheat, rye, and white bread flour to create complexity in texture and aroma.
Hydration level — the ratio of water to flour — plays a critical role. Higher hydration leads to a more open crumb and chewy interior, while lower hydration offers more control and yields a denser, more structured loaf. The right balance depends on flour strength, room temperature, and experience level.
Common pitfalls to avoid
Many beginners underestimate the importance of bulk fermentation and stretch-and-fold techniques. Overproofed dough loses its strength, while underproofed loaves can bake up dense. Temperature is another key factor: ambient room conditions can speed up or slow down fermentation significantly. Use visual and tactile cues — not just timers — to decide when the dough is ready.
Another frequent mistake is skipping the autolyse phase, where flour and water are mixed and rested before salt and starter are added. This critical step activates natural enzymes that improve gluten development and overall dough extensibility.
Benefits of baking sourdough at home
Making your own sourdough bread at home offers unmatched control over every aspect of the process — from fermentation time to crust darkness. Unlike store-bought versions, homemade loaves contain no preservatives, no commercial yeast, and no additives. You’re left with a clean, flavorful product that reflects your personal taste and the conditions of your kitchen.
The baking process itself also becomes a kind of personal ritual. Shaping the dough, scoring with a lame, and watching the oven spring unfold is as rewarding as it is technical. The result is a beautiful, rustic loaf with crackling crust and a rich, nuanced crumb.
How to tweak your recipe for improved results
Want more sourness? Extend the fermentation in the fridge for 24–48 hours to enhance the acetic acid profile. Prefer a lighter loaf? Incorporate a small percentage of spelt flour or bread flour to lighten the texture without losing flavor. For a softer crust, reduce baking time slightly or wrap the loaf in a towel after baking. To deepen the crust’s color and crunch, bake with steam or use a Dutch oven to trap moisture.
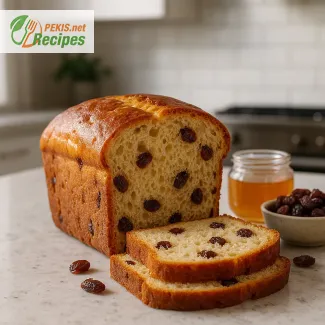
Adding seeds, nuts, or hydrated grains like oats can elevate your sourdough into something extraordinary. Soaking these inclusions beforehand ensures they don’t draw moisture from the dough, preserving your hydration balance.
Tools that elevate your bake
Essential tools include a bench scraper, proofing basket (banneton), lame (bread razor), and a digital scale. A Dutch oven or baking stone allows for even heat distribution and better crust development. A digital thermometer helps confirm the internal temperature of the loaf, ideally reaching around 96°C (205°F) for a fully baked crumb.
Controlling the environment is equally important. Fermenting in a cold kitchen during winter will dramatically extend your proofing times. Some bakers create a proofing box with a simple plastic container and a desk lamp to maintain a steady temperature.
From starter to slice: a timeline of dedication
The process of baking natural sourdough bread stretches across 24 to 72 hours depending on fermentation choices. It starts with refreshing the starter, then proceeds to mixing, autolyse, bulk fermentation, shaping, proofing, and baking. Each phase requires attention, but also offers flexibility — you can cold-proof overnight, adjust hydration to match your flour, and tailor the crust with steam or heat variations.
Texture, flavor and crust: what to expect
A well-made sourdough loaf has a crackling, blistered crust with deep caramel tones. The interior is slightly chewy with a balanced tang and moist crumb. The fermentation brings out hidden sweetness in the flour, especially if using a blend with whole grains. When toasted, the sourdough’s flavor intensifies, making it ideal for sandwiches, bruschetta, or just warm with butter and honey.
The crust should sing — literally — as it cools, releasing tension built up during the bake. This audio feedback is one of the small joys of sourdough baking, a reminder that you’ve captured something alive and real in your own kitchen.
Why sourdough is more than just bread
For many, sourdough baking becomes a lifestyle — a slower, more intentional way of engaging with food. It teaches patience, attentiveness, and rewards consistency. Over time, you’ll learn how your starter behaves, how your flour absorbs water, and how ambient humidity affects your dough. No two loaves are ever exactly the same, and that’s what makes it endlessly rewarding.
This connection to process, ingredients, and history makes 100% natural sourdough bread not just a recipe, but a craft.
- Autolyse: In a large mixing bowl, combine strong white bread flour, whole wheat flour, and water (without salt and starter). Mix until no dry flour remains. Cover and let it rest for 1 hour at room temperature.
- Mixing: Add the active sourdough starter and salt to the dough. Mix by hand until well incorporated, using the stretch and fold method.
- Bulk Fermentation: Cover the bowl and allow the dough to ferment for 4 to 5 hours at room temperature (~22°C / 72°F), performing a set of stretch and folds every 30 minutes for the first 2 hours.
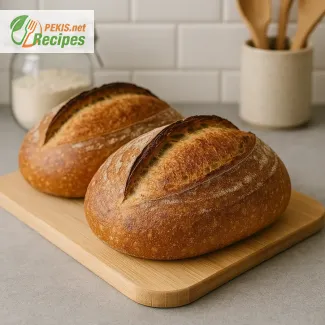
- Pre-shape: Lightly flour the work surface. Gently tip the dough onto the surface and divide it into two equal pieces. Shape each piece into a loose round. Let rest for 20 minutes uncovered.
- Final shaping: Shape each dough ball into a tight boule or batard. Place seam-side up in a floured proofing basket (banneton).
- Cold proof: Cover the baskets with cloth and refrigerate for 12 to 16 hours. This long, slow fermentation deepens the flavor and improves crust and crumb.
- Preheat the oven: Place a Dutch oven (or baking stone with steam tray) inside your oven. Preheat to 250°C (482°F) for at least 45 minutes before baking.
- Scoring and baking: Remove one dough from the fridge. Carefully invert it onto parchment paper. Score the top with a razor blade or lame. Transfer into the hot Dutch oven. Cover and bake for 20 minutes. Remove the lid and bake for another 25 minutes at 230°C (446°F), or until deeply golden. Repeat with the second loaf.
- Cooling: Let the bread cool on a wire rack for at least 2 hours before slicing to allow crumb structure to set properly.
Elevating Your Homemade Sourdough: Creative Techniques for Better Results
Expert strategies to transform your natural sourdough into an artisan masterpiece
Traditional sourdough bread already offers rich flavor, texture, and aroma, but even a time-honored recipe can be improved with thoughtful adjustments. Whether you're a seasoned home baker or just beginning your sourdough journey, there are multiple ways to deepen the complexity, improve structure, and tailor your loaf to match your taste or dietary needs. The following insights explore ingredient substitutions, technique enhancements, and healthy upgrades that bring even more life to a classic sourdough recipe.
Using flour combinations to enhance flavor and crumb
Adjusting the flour blend is one of the most effective ways to influence both taste and structure. While a mix of strong white bread flour and whole wheat flour provides a balanced base, introducing rye flour adds earthiness and helps retain moisture. For a nuttier flavor, incorporate spelt flour, which contributes a delicate sweetness and soft crumb. However, because spelt is lower in gluten, it’s best used in moderation (around 10–20% of total flour weight) to preserve dough elasticity.
For added aroma and nutrition, consider replacing part of the white flour with sprouted whole grain flour, which brings out natural enzymes and adds subtle maltiness. This tweak can improve fermentation activity, increase digestibility, and promote a more tender interior.
Hydration levels: balancing structure and chew
The hydration of sourdough dough — the ratio of water to flour — dramatically affects the final loaf. A higher hydration dough (above 75%) will yield a more open crumb and a moister, chewier bite. However, it requires more skill to handle. If you're new to high hydration, gradually increase water in 25 ml increments, observing how your dough responds.
Adding a soaker — such as flaxseed or chia seeds soaked in water — not only increases hydration but introduces fiber, texture, and flavor. These seeds act as natural dough conditioners, improving elasticity while giving the crumb a more rustic character.
Salt and fermentation: controlling tang and structure
Salt does more than enhance flavor — it also strengthens gluten and slows fermentation. Slightly reducing salt (e.g., from 20 g to 16 g) can accelerate fermentation, while increasing salt slightly deepens crust coloration and enhances shelf life. However, always measure accurately, as improper salt levels can hinder rise or create unpleasant flavor profiles.
To increase sourness, opt for a longer cold fermentation. Refrigerating the shaped dough for 36 to 48 hours allows more acetic acid to develop, which gives the loaf its classic tang. For a milder flavor, reduce cold fermentation to 8–12 hours and use a recently fed starter.
Enriching the dough with inclusions
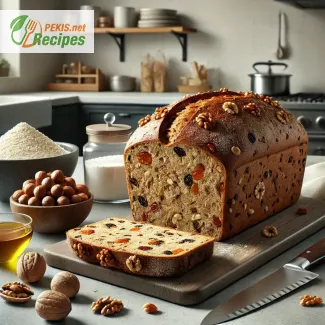
One of the most exciting ways to enhance sourdough is by adding inclusions such as roasted nuts, sunflower seeds, dried fruit, or olives. Each addition must be folded into the dough after bulk fermentation begins. Keep the total inclusion weight below 25% of the total flour to avoid structural issues.
Try hydrated oats or cooked grains like quinoa or millet for added moisture and nutrition. These grains soften the crumb and provide an earthy depth, making each slice more filling and satisfying.
Why homemade sourdough outperforms store-bought
Homemade sourdough offers unmatched control over ingredients, fermentation time, and baking technique. Many commercial loaves, even if labeled “sourdough,” contain commercial yeast, preservatives, or dough conditioners that compromise authenticity.
At home, you're using 100% natural fermentation, allowing beneficial bacteria to develop fully. The crust is more vibrant, the crumb more aromatic, and the flavor more personal. Additionally, sourdough made at home typically has a lower glycemic index, longer freshness, and better digestibility.
Common mistakes and how to avoid them
A common error is skipping the autolyse phase, resulting in poor gluten development and a tight crumb. Equally critical is understanding the signs of over-proofing: if the dough collapses when scored or feels weak and slack, you've gone too far. Stick to visual cues like a smooth, airy structure and gentle bounce when pressed.
Another mistake is baking before the dough has reached full proof. Perform the finger dent test — if the dough slowly springs back, it's ready. If it springs back too quickly, let it proof longer. If it doesn’t bounce back at all, it may be overproofed.
Using insufficient oven steam or failing to preheat your Dutch oven can result in a dull crust. Always preheat for at least 45 minutes and use steam during the first phase of baking to allow maximum oven spring and a glossy crust.
Health-forward alternatives and adaptations
For a more nutrient-dense loaf, substitute part of the flour with teff, buckwheat, or amaranth flour. These flours are naturally gluten-free and packed with minerals but should be combined with high-gluten flours for stability.
You can also reduce salt for those with hypertension or increase fiber content by integrating wheat bran or psyllium husk. These changes have minimal impact on texture but improve the bread’s functional benefits.
To create a gluten-free sourdough, use a gluten-free starter made with rice or buckwheat flour, and rely on a combination of rice flour, tapioca starch, and xanthan gum for structure. Though the technique is more involved, the result can be just as satisfying.
Flavor customization with herbs and spices
For added aroma and depth, consider mixing in rosemary, caraway seeds, or black cumin. A touch of garlic powder, onion flakes, or smoked paprika can lend savory warmth. Use spices sparingly to avoid overpowering the natural flavors.
To create sweet variations, fold in cinnamon, orange zest, or vanilla bean during mixing. These combinations work well for breakfast loaves or toasts and pair beautifully with butter, honey, or jam.
Enhancing crust texture and finish
Achieving a crackly crust is the hallmark of great sourdough. For a thinner, crispier crust, extend the final bake time uncovered by 5–10 minutes and allow the loaf to cool completely on a wire rack.
For a softer crust, wrap the hot loaf in a clean towel and allow it to steam itself gently as it cools. Brushing the crust with olive oil or butter while warm adds both shine and softness — perfect for sandwich loaves.
Dusting the top of the loaf with rice flour or semolina before scoring adds visual contrast and helps prevent sticking in the proofing basket.
Storing sourdough for extended freshness
To keep your sourdough loaf fresh for up to a week, wrap it in a linen cloth or store it cut-side down on a wooden board. Avoid plastic, which traps moisture and softens the crust. For longer storage, slice and freeze the bread in a sealed bag — then toast straight from the freezer for a fresh result.
Investing time into your sourdough practice means better results with each bake. With these targeted tips, ingredient swaps, and mindful techniques, your traditional loaf transforms into something truly exceptional — a reflection of your skill, creativity, and care.
Allergens present in the recipe:
- Gluten (from wheat flour)
Substitution tips for allergens and gluten:
- Replace wheat flours with a gluten-free bread flour blend containing rice flour, tapioca starch, and xanthan gum.
- Use a gluten-free sourdough starter made with brown rice flour or buckwheat flour.
Vitamins and minerals per serving (approximate):
- Iron: 1.4 mg – supports oxygen transport and energy metabolism
- Magnesium: 35 mg – helps muscle and nerve function, supports immune system
- Zinc: 0.8 mg – essential for immune function and enzyme activity
- Vitamin B1 (Thiamine): 0.2 mg – helps convert nutrients into energy
- Vitamin B3 (Niacin): 2.1 mg – supports skin health and brain function
- Phosphorus: 85 mg – supports bone health and energy production
- Selenium: 7 µg – contributes to antioxidant defense and thyroid health
Antioxidants per serving (approximate):
- Ferulic acid: 45 mg – protects cells from oxidative damage, supports skin health
- Lutein: 30 µg – supports eye health and neutralizes free radicals
- Betaine: 25 mg – supports liver function and protects cells from stress
Recipes worth trying