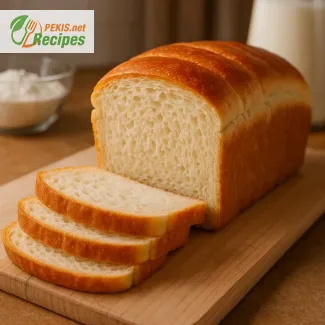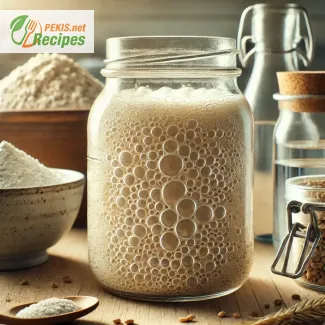
Sourdough starter—or simply starter—is an ancient, naturally fermented leavening used for baking artisanal breads and pastries. Unlike commercial yeast, a sourdough starter is a living culture of wild yeasts and beneficial bacteria, traditionally cultivated by combining just flour and water. When left to ferment, these simple ingredients create a bubbling, active mixture that can be used to rise dough naturally, giving sourdough bread its characteristic flavor, texture, and nutritional benefits. Known by other names, such as levain, wild yeast starter, or natural leaven, the sourdough starter has found its way into the hearts of bakers worldwide due to its versatility, rich history, and unique benefits for health and baking.
Historically, sourdough was the primary method for leavening bread before the invention of commercial yeast. This method dates back over 5,000 years, to ancient Egypt, and has been passed down through generations. The starter acts as the foundation for sourdough baking, a process that involves a symbiotic relationship between wild yeast and lactic acid bacteria. This combination not only produces the carbon dioxide necessary to make bread rise but also creates lactic acid, which imparts the sour tang that defines sourdough bread. When flour and water are mixed and left to rest, the natural yeast and bacteria present in the environment and on the flour begin to ferment, producing a complex and evolving starter.
A well-maintained sourdough starter is like a living pet—it requires regular feeding with equal parts flour and water to keep it active and thriving. This feeding process allows the starter to generate its natural yeast over time, which gives the resulting bread a deeper, more nuanced flavor than bread made with commercial yeast. The tangy taste, chewy texture, and crisp crust of sourdough are unmatched, and its digestive benefits make it a popular choice among those seeking a more natural, nutritious bread.
In terms of usage, the sourdough starter isn’t limited to traditional sourdough loaves. It is highly adaptable and can be incorporated into a variety of baked goods, from pizza dough to pancakes, muffins, and even pastries. Each baked item benefits from the starter’s unique properties: it provides a complex depth of flavor, a light crumb, and a slightly tangy note that pairs well with both sweet and savory ingredients. This versatility has made sourdough starter an indispensable tool in kitchens worldwide, both for its flavor and for the unique health benefits it imparts.
Sourdough bread is widely known for being easier to digest than many other types of bread, as the lengthy fermentation process breaks down complex starches and gluten, making the bread more accessible to those with mild gluten sensitivities. This fermentation process also helps to preserve the bread naturally, giving it a longer shelf life without the need for preservatives. The natural acidity acts as a preservative, meaning sourdough breads can often stay fresh for several days, while also promoting beneficial gut bacteria when consumed. In addition to the improved digestibility, sourdough bread contains more bioavailable nutrients compared to commercially yeasted bread, providing essential minerals like iron, zinc, and magnesium.
Creating and maintaining a sourdough starter is both an art and a science. For bakers and enthusiasts, it requires patience, consistency, and care. In return, they gain a living, breathing leaven that imparts a rich legacy of flavor and tradition to their baking. Additionally, the starter serves as a blank canvas for experimentation; each starter will develop its own unique characteristics based on its environment, the types of flour used, and the maintenance routine. This means that no two sourdough starters are exactly alike, giving bakers a unique personal connection to their bread.
The popularity of sourdough has surged in recent years, with a growing number of people interested in home baking and exploring ancient methods of bread making. Many find the process therapeutic, a way to slow down and connect with the simplicity of food preparation. For new bakers, starting a sourdough starter may seem intimidating, but with just flour, water, and a bit of patience, anyone can begin to cultivate a starter and experience the satisfaction of baking naturally leavened bread.
Whether you call it sourdough starter, levain, wild yeast starter, or natural leaven, this humble mixture of flour and water has a profound ability to transform the baking experience, creating breads that are rich in flavor, nutritionally superior, and easier to digest. It represents a return to tradition in the modern kitchen, a journey into the science of fermentation, and an invitation to savor bread in its most authentic form. For anyone looking to elevate their baking, mastering the art of sourdough starter is an inspiring place to begin.
Initial Setup: 5-7 days
Daily Maintenance Time: 10 minutes
Total Initial Time to Fully Active Starter: 5-7 days
Step-by-Step Preparation
Day 1:
- In a clean glass container, combine 100 g of whole wheat flour (¾ cup) and 100 ml of room-temperature water (3 ½ fl oz).
- Stir until fully mixed. The consistency should be thick but pourable.
- Cover loosely with a cloth or lid, and leave it at room temperature for 24 hours.
Day 2:
- Check for bubbles indicating fermentation.
- Discard half of the mixture (around 100 g) and add another 100 g of flour (¾ cup) and 100 ml of water (3 ½ fl oz).
- Stir well, cover, and let rest for another 24 hours.
Day 3 to Day 5 (or until Active):
- Repeat the feeding process each day. Discard half of the mixture and add fresh flour and water.
- By Day 3 or 4, a tangy aroma should develop, and the starter will begin to rise and fall after feeding.
- Once you see consistent bubbling and doubling in size within 4-6 hours after feeding, the starter is active and ready for baking.
Ongoing Maintenance (After Day 5):
- Feed daily if kept at room temperature or weekly if refrigerated.
- To bake with the starter, use it 4-6 hours after feeding for optimal activity.
Creating a successful and resilient sourdough starter requires some key insights into the process, as well as an understanding of how small adjustments can significantly influence the final results. Here are essential tips to optimize your starter, manage it more effectively, and adapt it to fit your unique baking needs or preferences.
1. Flour Type Selection and Its Impact
While the recipe suggests using whole wheat flour, you can choose other types of flour based on flavor, nutritional content, or availability:
- Whole Wheat Flour: This provides ample nutrients for the wild yeast, helping to speed up the fermentation process and promote a strong rise. Whole wheat flour generally results in a more robust and earthy flavor.
- Rye Flour: Rye flour is highly active in terms of fermentation, as it’s particularly rich in nutrients that favor yeast growth. Adding 20-30% rye flour for the first few days of feeding can help establish a healthy starter faster.
- All-Purpose Flour: For a milder flavor profile, or if you prefer a more neutral starter, all-purpose flour can be used. Note that this flour requires more frequent feedings, as it has slightly fewer nutrients than whole wheat or rye.
- Alternative Flours (for Gluten-Free Options): Brown rice flour or a gluten-free flour blend can be used for those sensitive to gluten. While gluten-free starters may take longer to mature, they can provide a similar level of leavening for gluten-free baking.
2. Water Temperature Control for Fermentation Rate
The temperature of the water used in each feeding is a subtle yet impactful factor in controlling the starter's fermentation rate:
- Warmer Water (30-32°C): In colder climates or during winter, warm water can speed up fermentation, helping the yeast culture thrive.
- Cooler Water (18-22°C): If you find that your starter becomes overly active or develops too much acidity, cooler water can help to moderate the fermentation pace, balancing out the flavors and ensuring stability.
3. Adjusting Hydration for Texture and Versatility
Changing the hydration of your starter can impact its flavor, rise, and overall characteristics:
- Higher Hydration (100% or More): Following the basic 1:1 ratio of flour to water creates a “liquid” starter, which ferments more quickly and tends to yield a tangier flavor profile. High hydration also contributes to a softer, airier crumb in bread.
- Lower Hydration (50-75%): Lowering the water content produces a stiffer starter, which ferments more slowly and results in a milder flavor. This is often preferable for a bread with a tighter crumb and less sourness, as well as for recipes that call for a more controlled leavening power.
4. Environmental Temperature and Fermentation Control
A starter’s activity is highly sensitive to the surrounding temperature. Consider these adjustments based on your kitchen environment:
- Cooler Temperatures (18-21°C): Slows fermentation, resulting in a more mild flavor. Placing the starter in a cooler spot or even the refrigerator between feedings can help maintain stability.
- Warmer Temperatures (24-28°C): Speeds up fermentation, leading to a more active starter and often a more pronounced tang. Ideal for rapid activation but may require more frequent feeding.
- Humidity: Humid environments can boost microbial activity in the starter, enhancing its rise but possibly affecting texture. In drier climates, it may be helpful to lightly cover the container with a damp cloth to maintain moisture.
5. Feeding Ratios for Optimal Flavor and Strength
Feeding ratios—meaning the amount of new flour and water added in each feeding—can influence both the flavor and the performance of your starter:
- 1:1:1 Ratio (starter:flour): This is a balanced approach that maintains a steady rise and fall cycle, suitable for general baking.
- 1:2:2 Ratio: Feeding with double the amount of flour and water (compared to the amount of starter) can help reduce acidity, leading to a more mild and less sour flavor.
- 1:3:3 or Higher Ratios: For an even milder flavor, use a higher feeding ratio to dilute the acidity further. This also strengthens the yeast, providing a reliable leaven for high-rising breads.
6. Choosing a Suitable Container for Maintenance
The container used for your starter affects not only its appearance but also its ability to breathe and ferment evenly:
- Glass Containers: These allow you to monitor the starter’s activity and rise visually. Ensure the container is tall enough to allow the starter to double in size.
- Breathable Lids: Use a cloth or loosely fitted lid to allow air to circulate, preventing pressure buildup and encouraging the growth of wild yeast. This is especially important for starters in warmer environments.
- Narrow Containers: These can encourage vertical growth, making it easier to observe rising activity and gauge when the starter is ready to use.
7. Adjusting for Taste Preferences
Sourdough starter is known for its slightly tangy, mildly acidic flavor, which some bakers prefer to enhance or minimize:
- Tangier Flavor: To enhance the tang, maintain a more liquid starter (100% hydration or higher) and keep the starter in a warmer spot, ideally around 24-28°C. Higher acidity also develops with less frequent feeding.
- Milder Flavor: Opt for lower hydration (around 70%) and a cooler storage environment, which will reduce the starter’s acidity and yield a more balanced, mellow taste.
8. Storing and Pausing a Starter
If you plan to take a break from baking or don’t want to feed your starter daily, there are methods for storing it without compromising its quality:
- Refrigeration: Store the starter in the refrigerator, feeding it once a week. This dramatically slows fermentation and reduces the need for daily maintenance.
- Freezing: For long-term storage, freezing a small portion of the starter can allow you to pause it indefinitely. When you’re ready to use it again, thaw the starter and feed it daily until it becomes active.
- Drying: Drying a portion of your starter is a useful backup plan. Spread a thin layer of starter on parchment paper, let it dry, and store it in an airtight container.
9. Troubleshooting Common Issues
Several issues can arise with sourdough starters, but many are easily remedied:
- Grayish Liquid on Top (Hooch): This alcohol by-product can indicate that the starter is hungry. Simply pour it off, discard half of the starter, and feed it as usual.
- Lack of Bubbles/Activity: If no bubbles appear within the first few days, check the temperature, try a different type of flour, or add a small amount of rye flour to jumpstart fermentation.
- Unpleasant Smell: A healthy starter should smell slightly sour but not putrid. A strong off-odor often indicates spoilage; in this case, it’s best to discard the starter and begin a fresh one.
10. Repurposing Starter Discards for Reduced Waste
During regular feedings, you’ll often have to discard some of the starter. Instead of wasting this portion, consider using it in various recipes:
- Pancakes and Waffles: Starter discard adds depth of flavor and tenderness to these breakfast favorites.
- Crackers: Sourdough crackers are simple to make, crispy, and full of flavor, turning discards into a delicious snack.
- Quick Breads: Add starter discard to banana bread, muffins, or even scones for a unique, slightly tangy twist.
In conclusion, sourdough starter is a versatile, adaptive base that can be tailored to suit both your baking goals and your flavor preferences. Through experimenting with ingredients, hydration, and feeding schedules, you can create a starter that truly reflects your culinary style and provides a reliable foundation for a wide range of baked goods.
This recipe contains gluten from wheat flour. To make a gluten-free starter, substitute with a gluten-free flour blend or use brown rice flour. Note that gluten-free starters may take longer to establish.
- Vitamin B1 (Thiamine): Essential for energy metabolism and nerve function.
- Vitamin B3 (Niacin): Supports digestive health and skin function.
- Iron: Crucial for oxygen transport in the blood.
- Magnesium: Important for muscle and nerve function, regulating blood pressure.
- Selenium: Acts as an antioxidant, reducing oxidative stress and supporting immune health.
- Phenolic Acids (if whole grain flour is used): Known for anti-inflammatory properties that benefit gut health.
